Get started
Start here
You've signed up, and your restaurant runs on table counts: you told us how many tables of each size you have, and bookings are counted against them. That's enough to take bookings today.
From here you have two ways forward:
- Stay on table counts. Check your counts, then go live.
- Move to a floor plan. Build it yourself or with us, switch to it, then go live.
Two ways to run your capacity
Table counts. You enter how many 2-tops, 4-tops and so on you have. A table seats its size or one fewer: a 4-top takes a party of 3 or 4. A booking takes one table of the smallest size that fits, for the length of the meal plus your reset time. Nobody is booked at a particular table: you seat them where you like when they arrive. For a party no single table seats, the reservation panel tells you which tables to push together.
Floor plan. A map of your room, with every table and its seats. Each booking lands on a real table, so you know who sits where before service starts.
| Table counts | Floor plan | |
|---|---|---|
| Bookings counted against | How many tables of each size | The tables on your map |
| Who sits where | You decide at the door | Set on each booking |
| Floor view in the Service view | No | Yes |
| Guests choose bar, booth or patio | No | Yes |
| Tables combined for bigger parties | You push them together | Saved combinations |
| Tables assigned automatically | No | Yes, if you turn it on |
Table counts are for when you're comfortable building the room on the fly, and just want to know you have the reservations to fill it. A floor plan is for when you want the room built before service begins.
Want a floor plan? Click Request floor plan setup on the Capacity card and we'll open it for you. You can build it yourself, or we'll build it with you.
If you stay on table counts
You most likely entered your table counts when you signed up. If you did, there's nothing to do here: go live.
To review or change them:
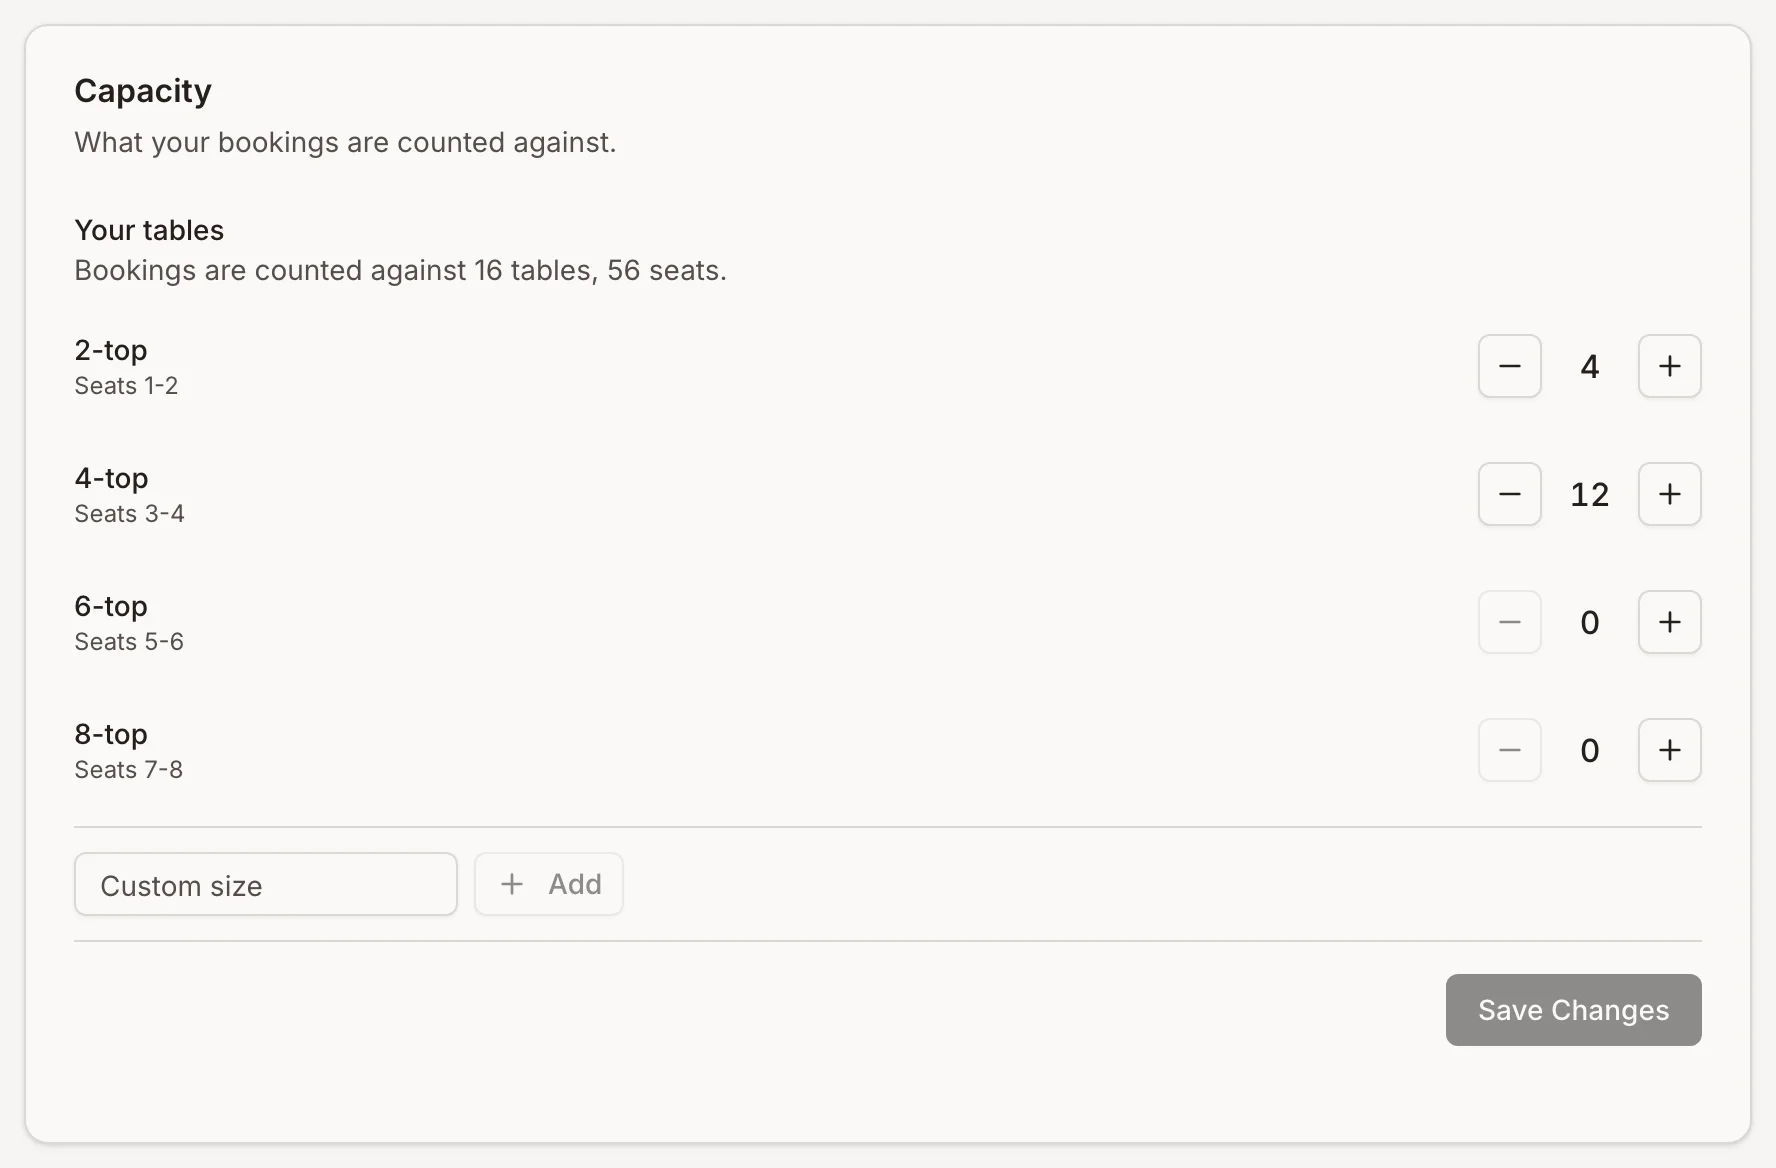
- Go to Admin, then General, then Capacity.
- Under Your tables, use + and − to set how many tables of each size you have. Need a size that isn't listed, like a 10-top? Enter it under Custom size and click Add.
- Click Save Changes.
The line under Your tables shows the total your bookings are counted against.
If you switch to a floor plan
Once we've opened your floor plan, it takes three steps:
- Switch on a zone, on the Floor plan tab.
- Switch in Capacity. Until you do, bookings are still counted against your table counts, even with your tables on the Floor plan tab.
- Turn on auto-assign (highly recommended).
1. Switch on a zone
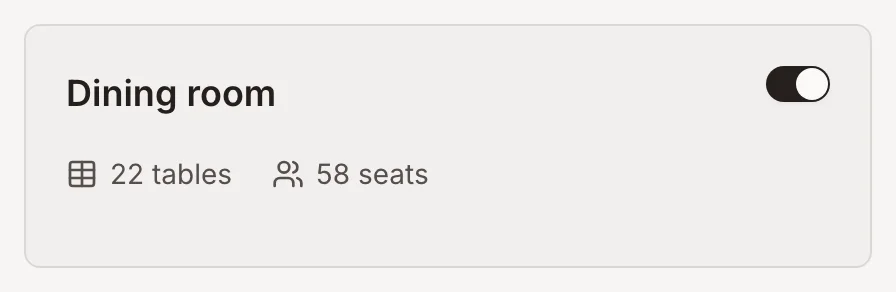
Your floor plan is made of zones. Most restaurants need just one: the dining room, the bar and the patio can all go in it, and seating types on the tables tell them apart.
Bookings can only use a zone that is switched on, and a new zone starts switched off. On the Floor plan tab, turn on the switch on your zone's card. No zone yet? Click Create Zone and place your tables.
2. Switch in Capacity
-
On the Floor plan tab, click Switch in Capacity, or go to Admin, then General, then Capacity.
-
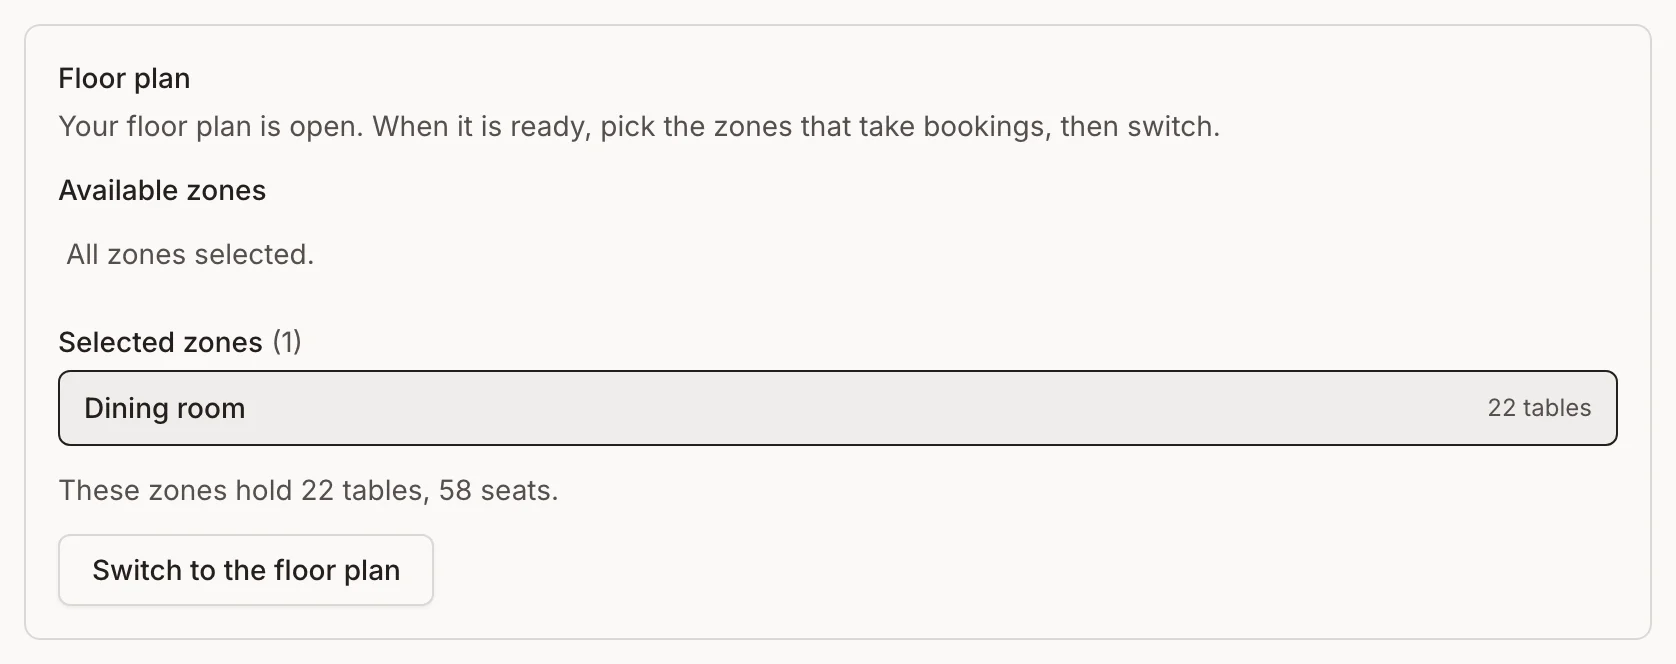
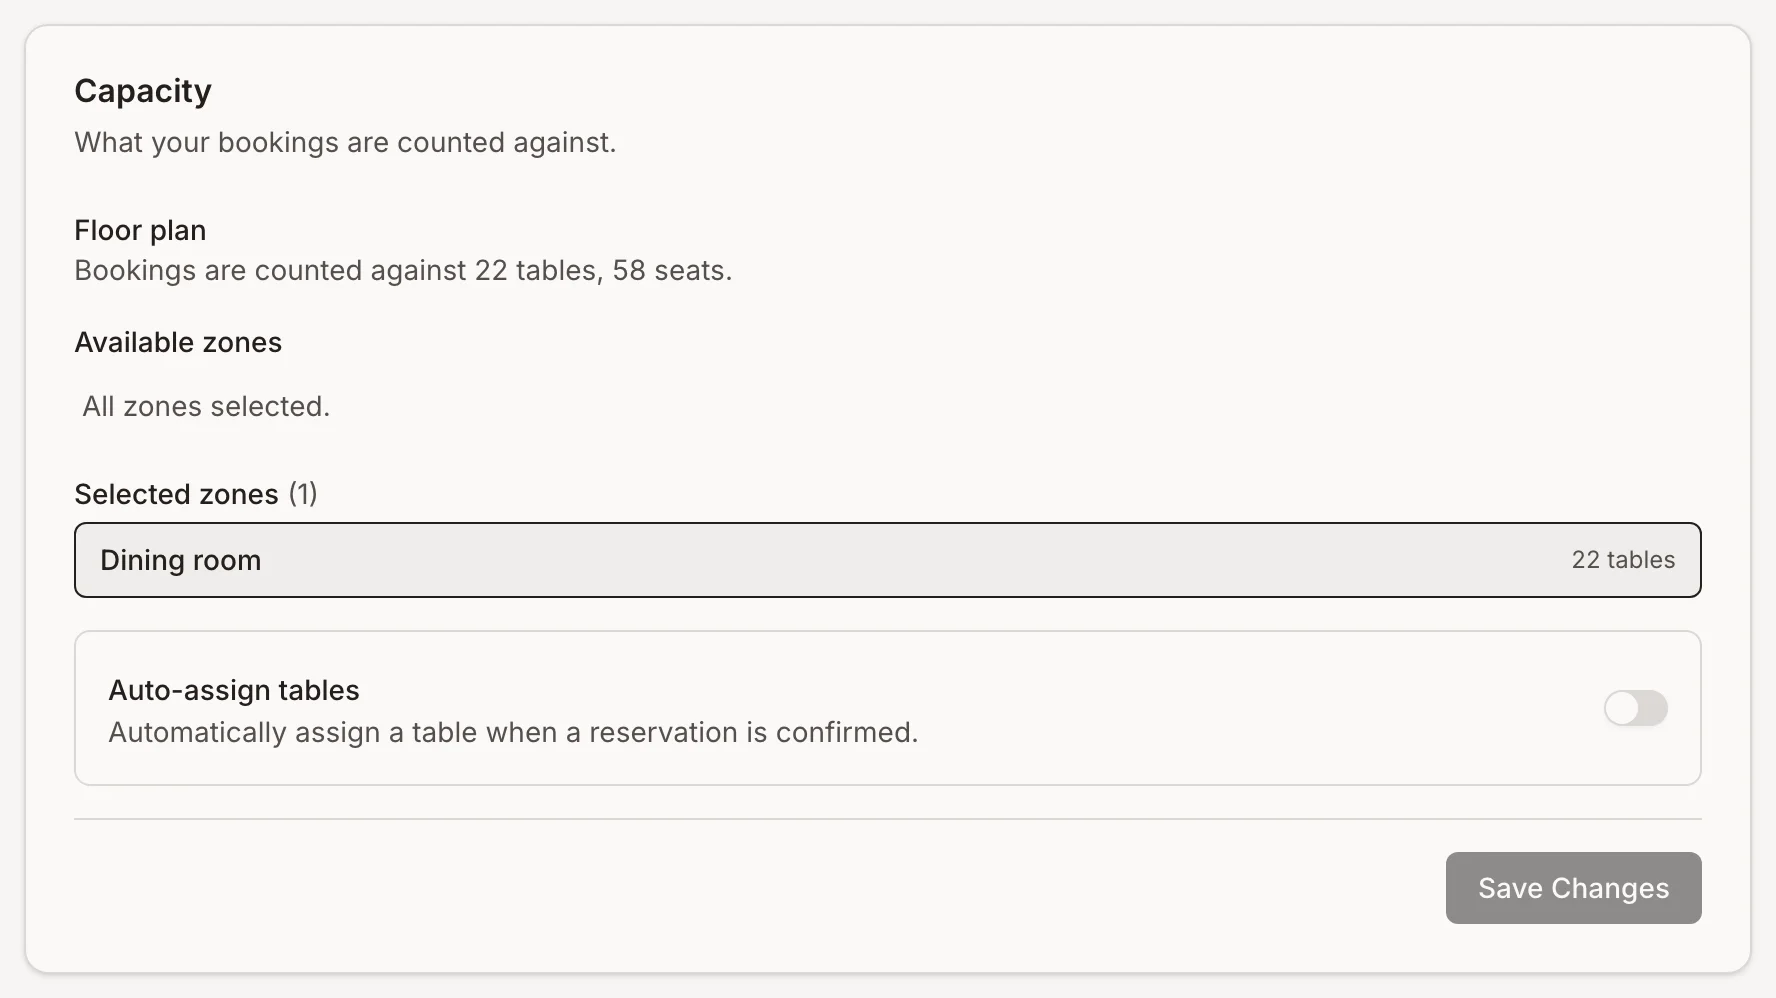
Under Floor plan, click each zone that takes bookings: it moves to Selected zones.
-
Check the line under them: it shows how many tables and seats those zones hold.
-
Click Switch to the floor plan.
-
Click Switch to the floor plan again to confirm.
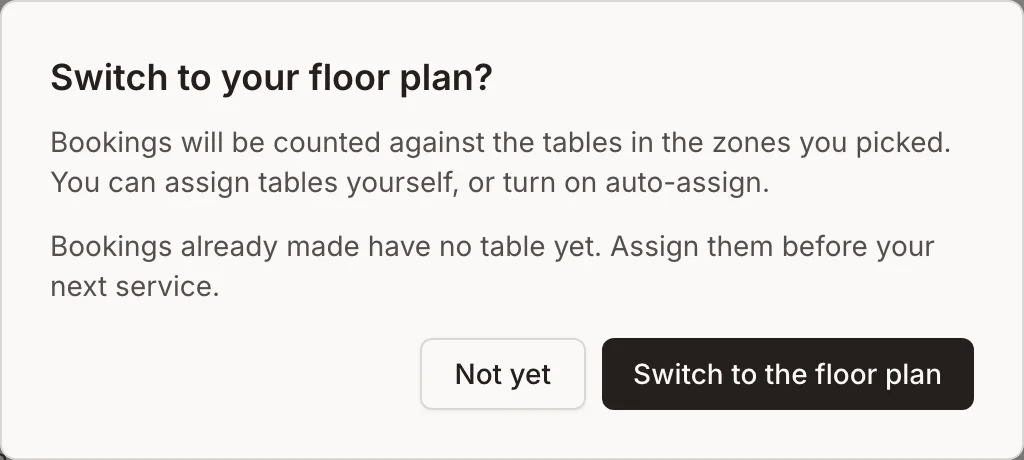
Bookings are now counted against your floor plan. Bookings made before the switch have no table yet: assign them before your next service.
3. Turn on auto-assign (highly recommended)
Once you've switched, the Capacity card offers Auto-assign tables: each new booking gets a free table automatically, so nothing waits on someone to place it. We highly recommend it, especially if you use table combinations. You can still move any booking by hand. Turn it on, then click Save Changes.
Go live
Your booking page starts in Preview: you can try it, but guests can't find it yet.
- Go to Admin, then Widget.
- Check Requirements: it shows All met once your restaurant information, operating hours, tables and reservation settings are in. If one is missing, the list opens: click it to go to its setting.
- Click Go Live.
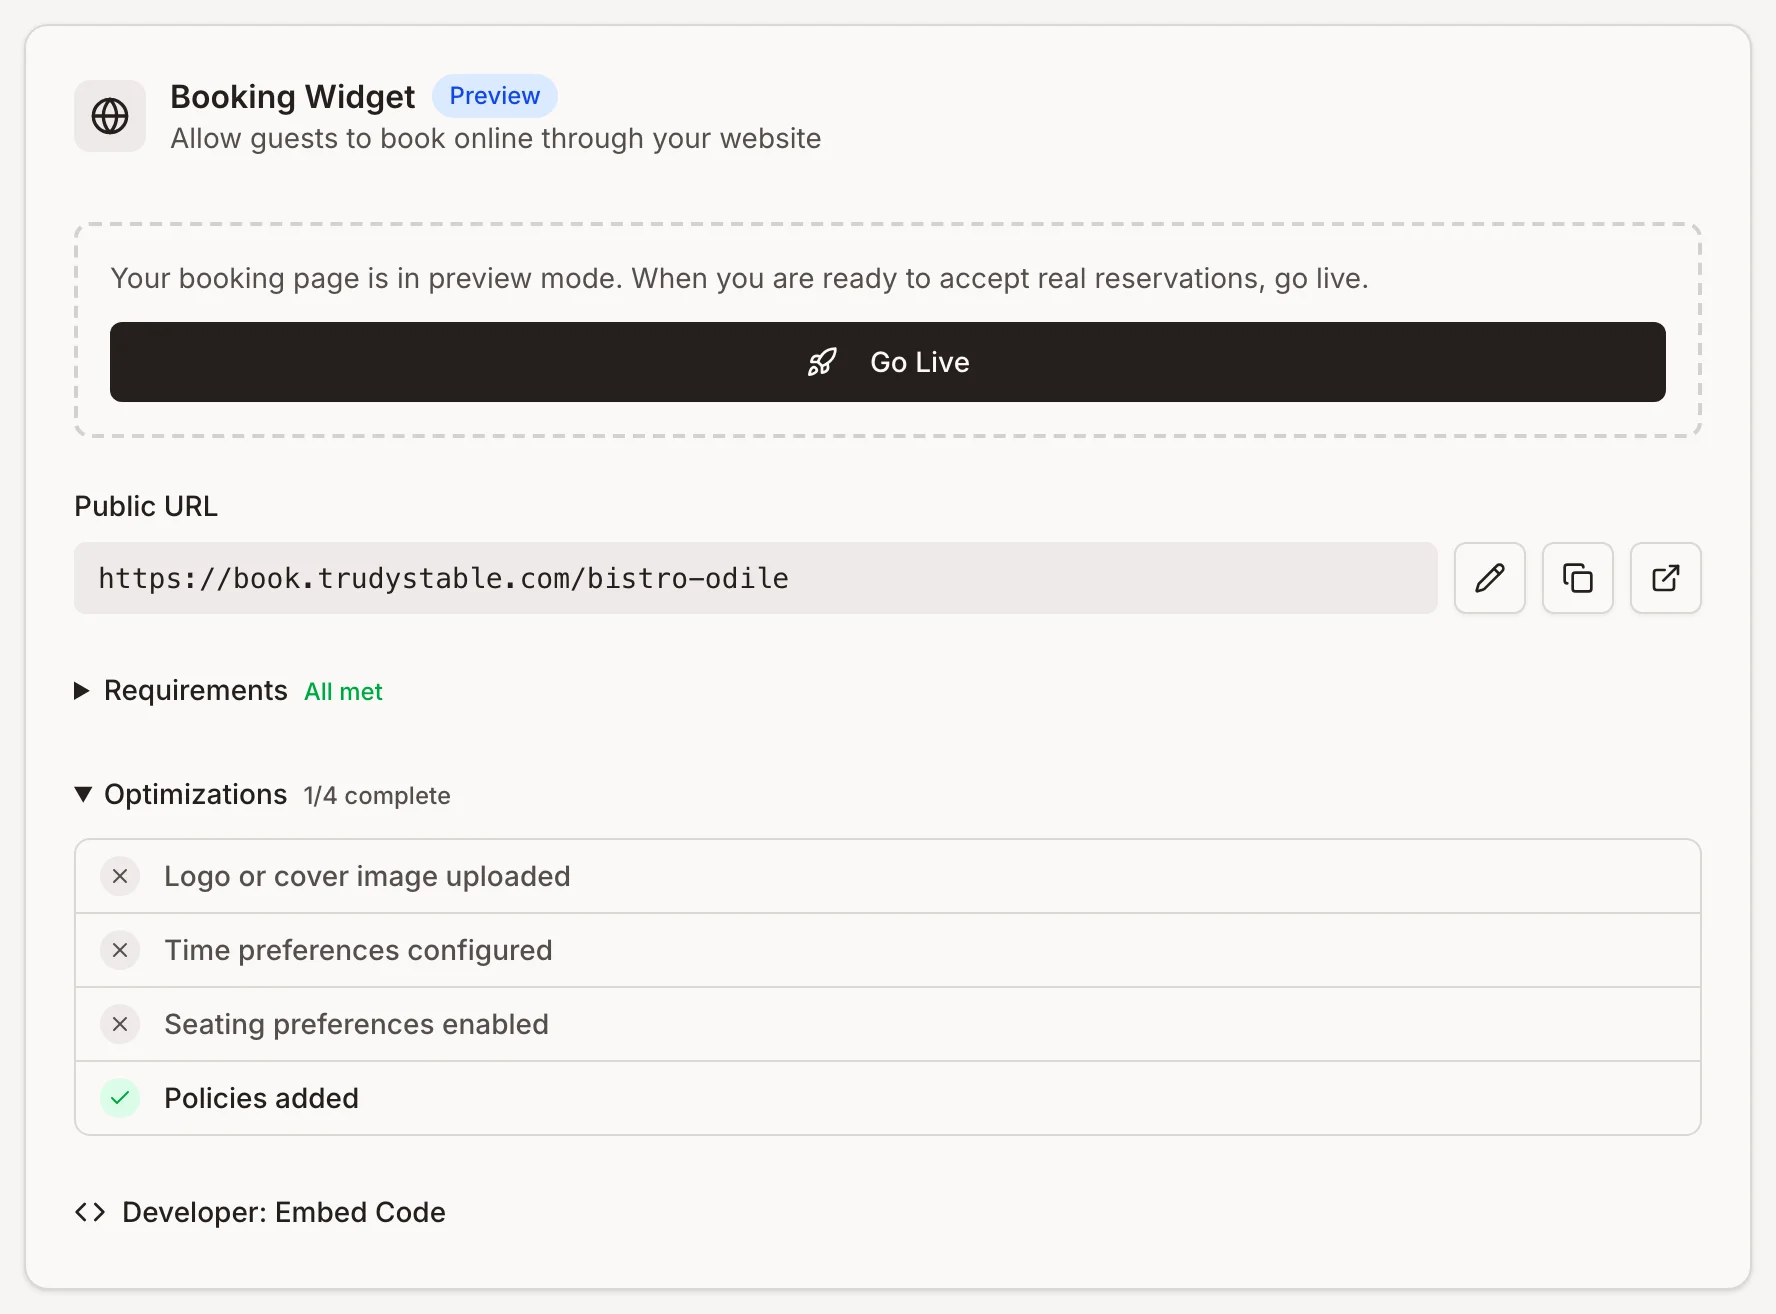
Then share your booking page: copy the link under Public URL, or open Developer: Embed Code to put the booking widget on your website.
Requested a floor plan? Switch to it before you go live, so every booking lands on a table.
Turn on notifications
Every new online booking or cancellation can notify your phone, tablet or computer. The notification tells you how many are waiting in your Inbox, and tapping it opens the Inbox.
You can turn notifications on for as many devices as you like: your phone, a second phone, the computer at the host stand. Turn them on once on each device:
- On an iPhone or iPad, add the dashboard to your Home Screen first. Open your dashboard in the browser, tap Share, then Add to Home Screen. On an iPhone or iPad, notifications only work from the Home Screen icon. On Android and on a computer, skip this step: notifications work straight from the browser.
- Open the dashboard (on an iPhone or iPad, from the Home Screen icon), go to the Inbox, and turn on Notify me on this device.
- Allow notifications when the browser asks.
Opening the Inbox clears the notification on that device.
Tip for Android: to save battery, a phone or tablet that has been locked for a while holds notifications until you unlock it. Nothing is lost: every booking is in your Inbox.
If the switch says This device can't receive notifications, use a phone instead. If it says notifications are blocked, allow them for this site in the browser's settings, then turn the switch on.
Set up your host-stand tablet
A tablet at the host stand keeps the dashboard open all service. Install the dashboard on it as an app: it opens full screen, without the browser's address bar, and gets its own icon on the home screen.
- Open your dashboard in the browser on the tablet.
- On Android, open the browser menu and choose Install app (in some versions it sits under Add to Home screen, then Install). Choose the install over a shortcut: only the install opens full screen. On an iPad, tap Share, then Add to Home Screen.
- Open the dashboard from its new icon, then turn on notifications as above. A tablet in use shows them right away.
What's next
Nothing below is needed to take bookings. Set it up when you're ready:
- Hours and services: lunch and dinner with their own times and rules, in Admin, then Services.
- Card on file: ask guests for a card at booking to cut no-shows, in Admin, then Widget.
- Offers: perks your guests can claim with their booking, in Admin, then Offers.
Running a service:
- Add, modify or cancel a reservation
- Quick reference, one page for the host stand
- Dashboard key: every button, badge and colour