Add, modify or cancel a reservation
Phone bookings, changes and cancellations all happen from the Reservations tab, in the Service view.
Add a reservation
-
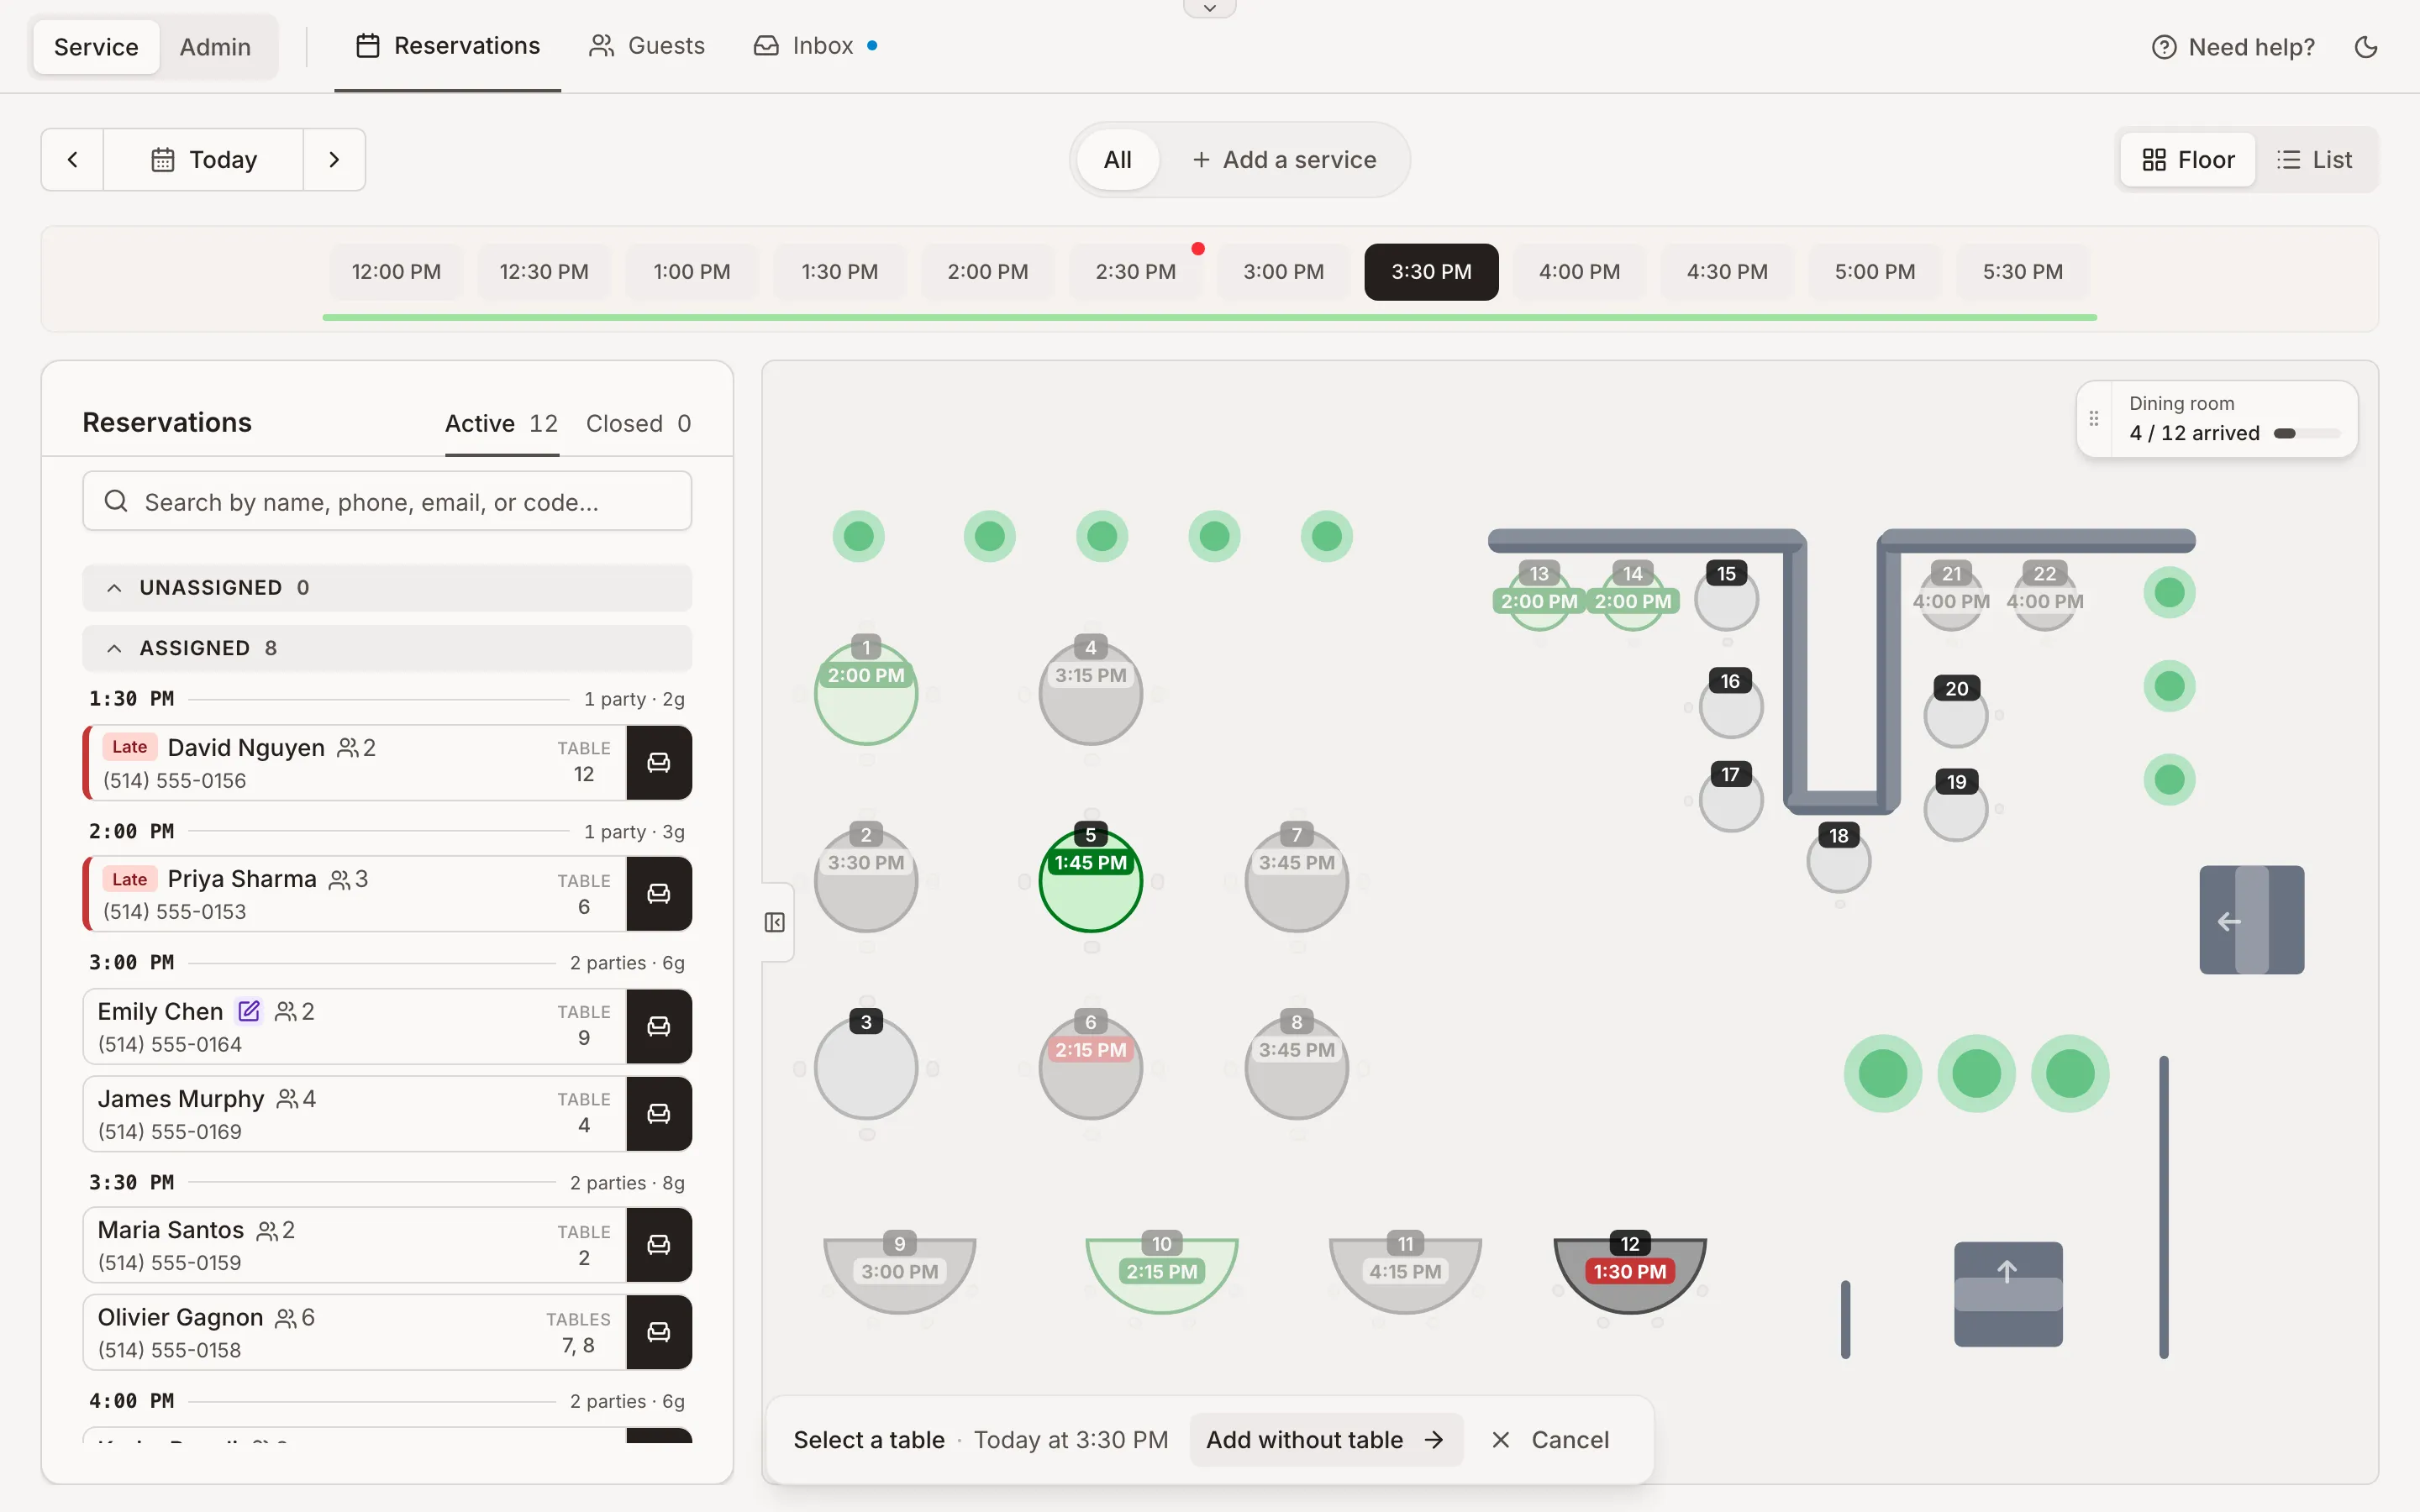
On the time bar, click the time the guest wants. The current time slot is kept for walk-ins, so pick a later one. For another day, either use the arrows next to Today before you click, or change the date afterwards in the reservation panel.
-
On the floor plan, click a free table. Or click Add without table and leave the table for later.
-
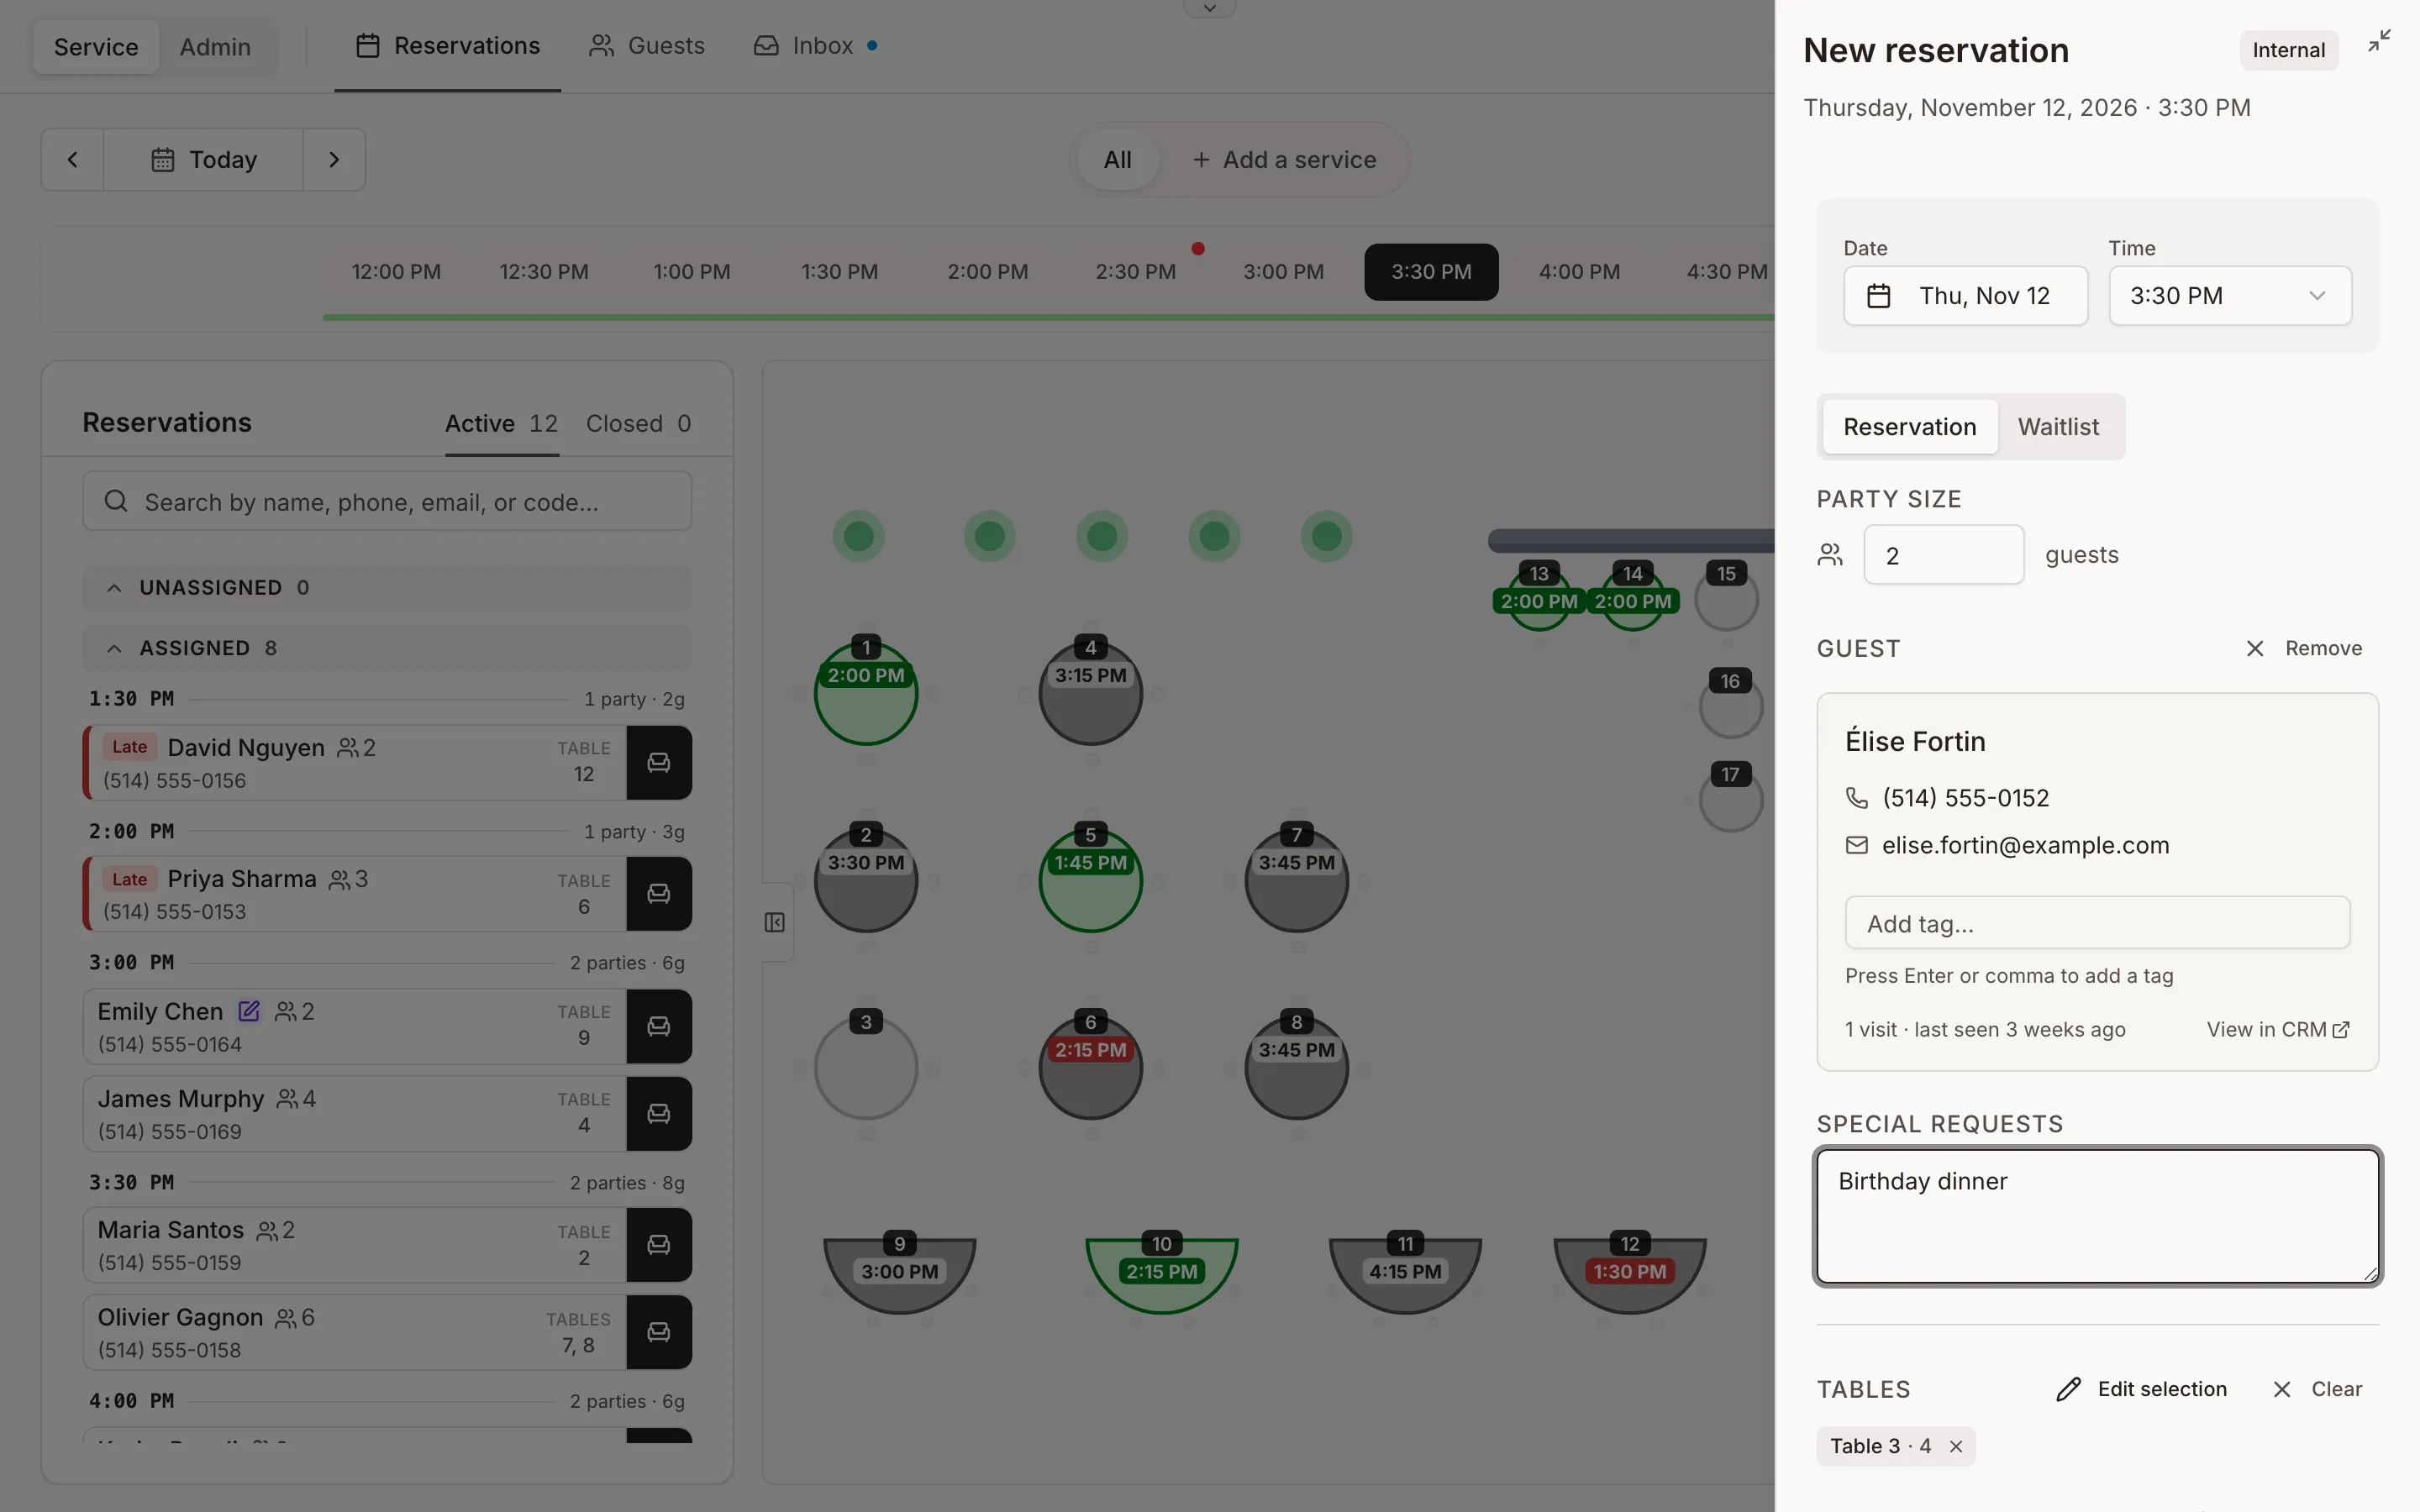
In the New reservation panel, enter the party size.
-
Under Guest, search by name or phone number. If the guest has never booked with you, choose Add new guest and enter their details.
-
Add anything the kitchen or floor should know under Special requests: a birthday, an allergy, a high chair.
-
Click Create reservation.
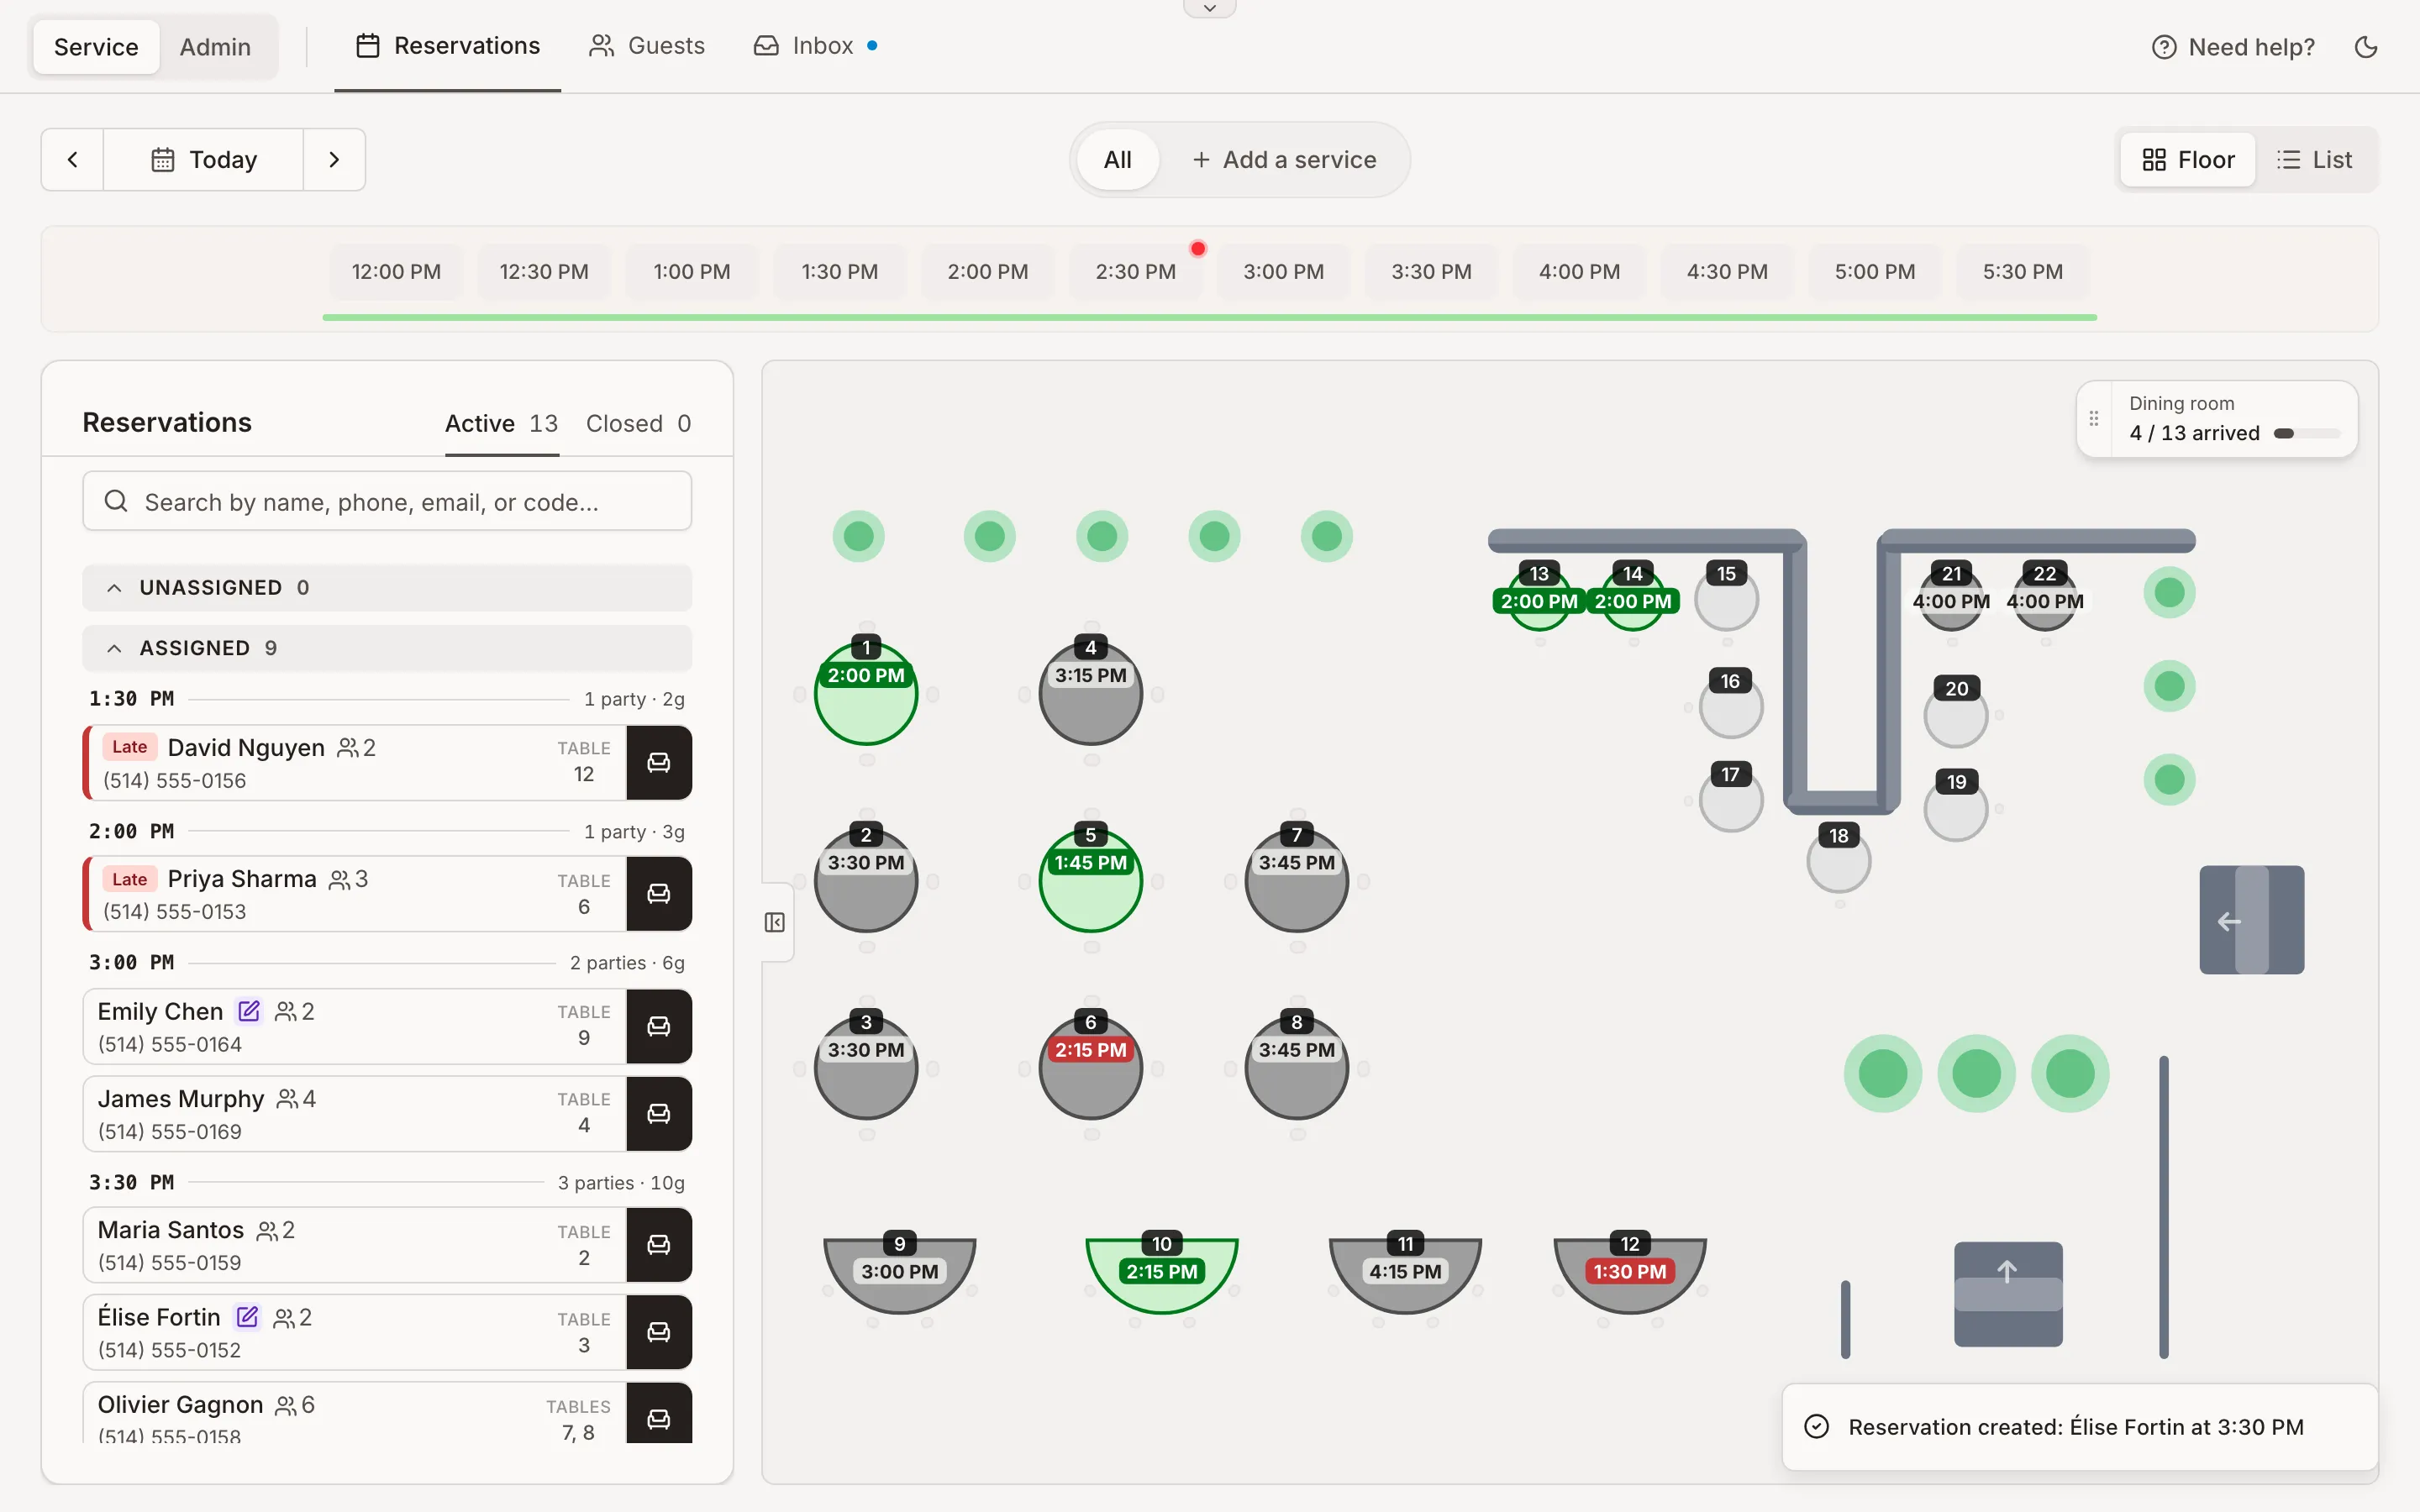
The reservation now shows on its table and in the list on the left.
Auto-assign. If auto-assign is on (Admin, then General), a reservation added without a table gets a free one automatically. It never overrides you: a table you click on the floor plan, or pick later in the reservation, is the one the guest gets.
On table counts? There's no table to pick: the reservation counts against your seats automatically.
Change a reservation
- Click the reservation in the list on the left, then click it again: the first click selects it for a table move, the second opens it. In the List view, one click opens it.
- Click the pencil next to the date to change the date, time or party size.
- Leave Notify guest by email ticked to send the guest the new details, or untick it if you have already told them.
- Click Save.
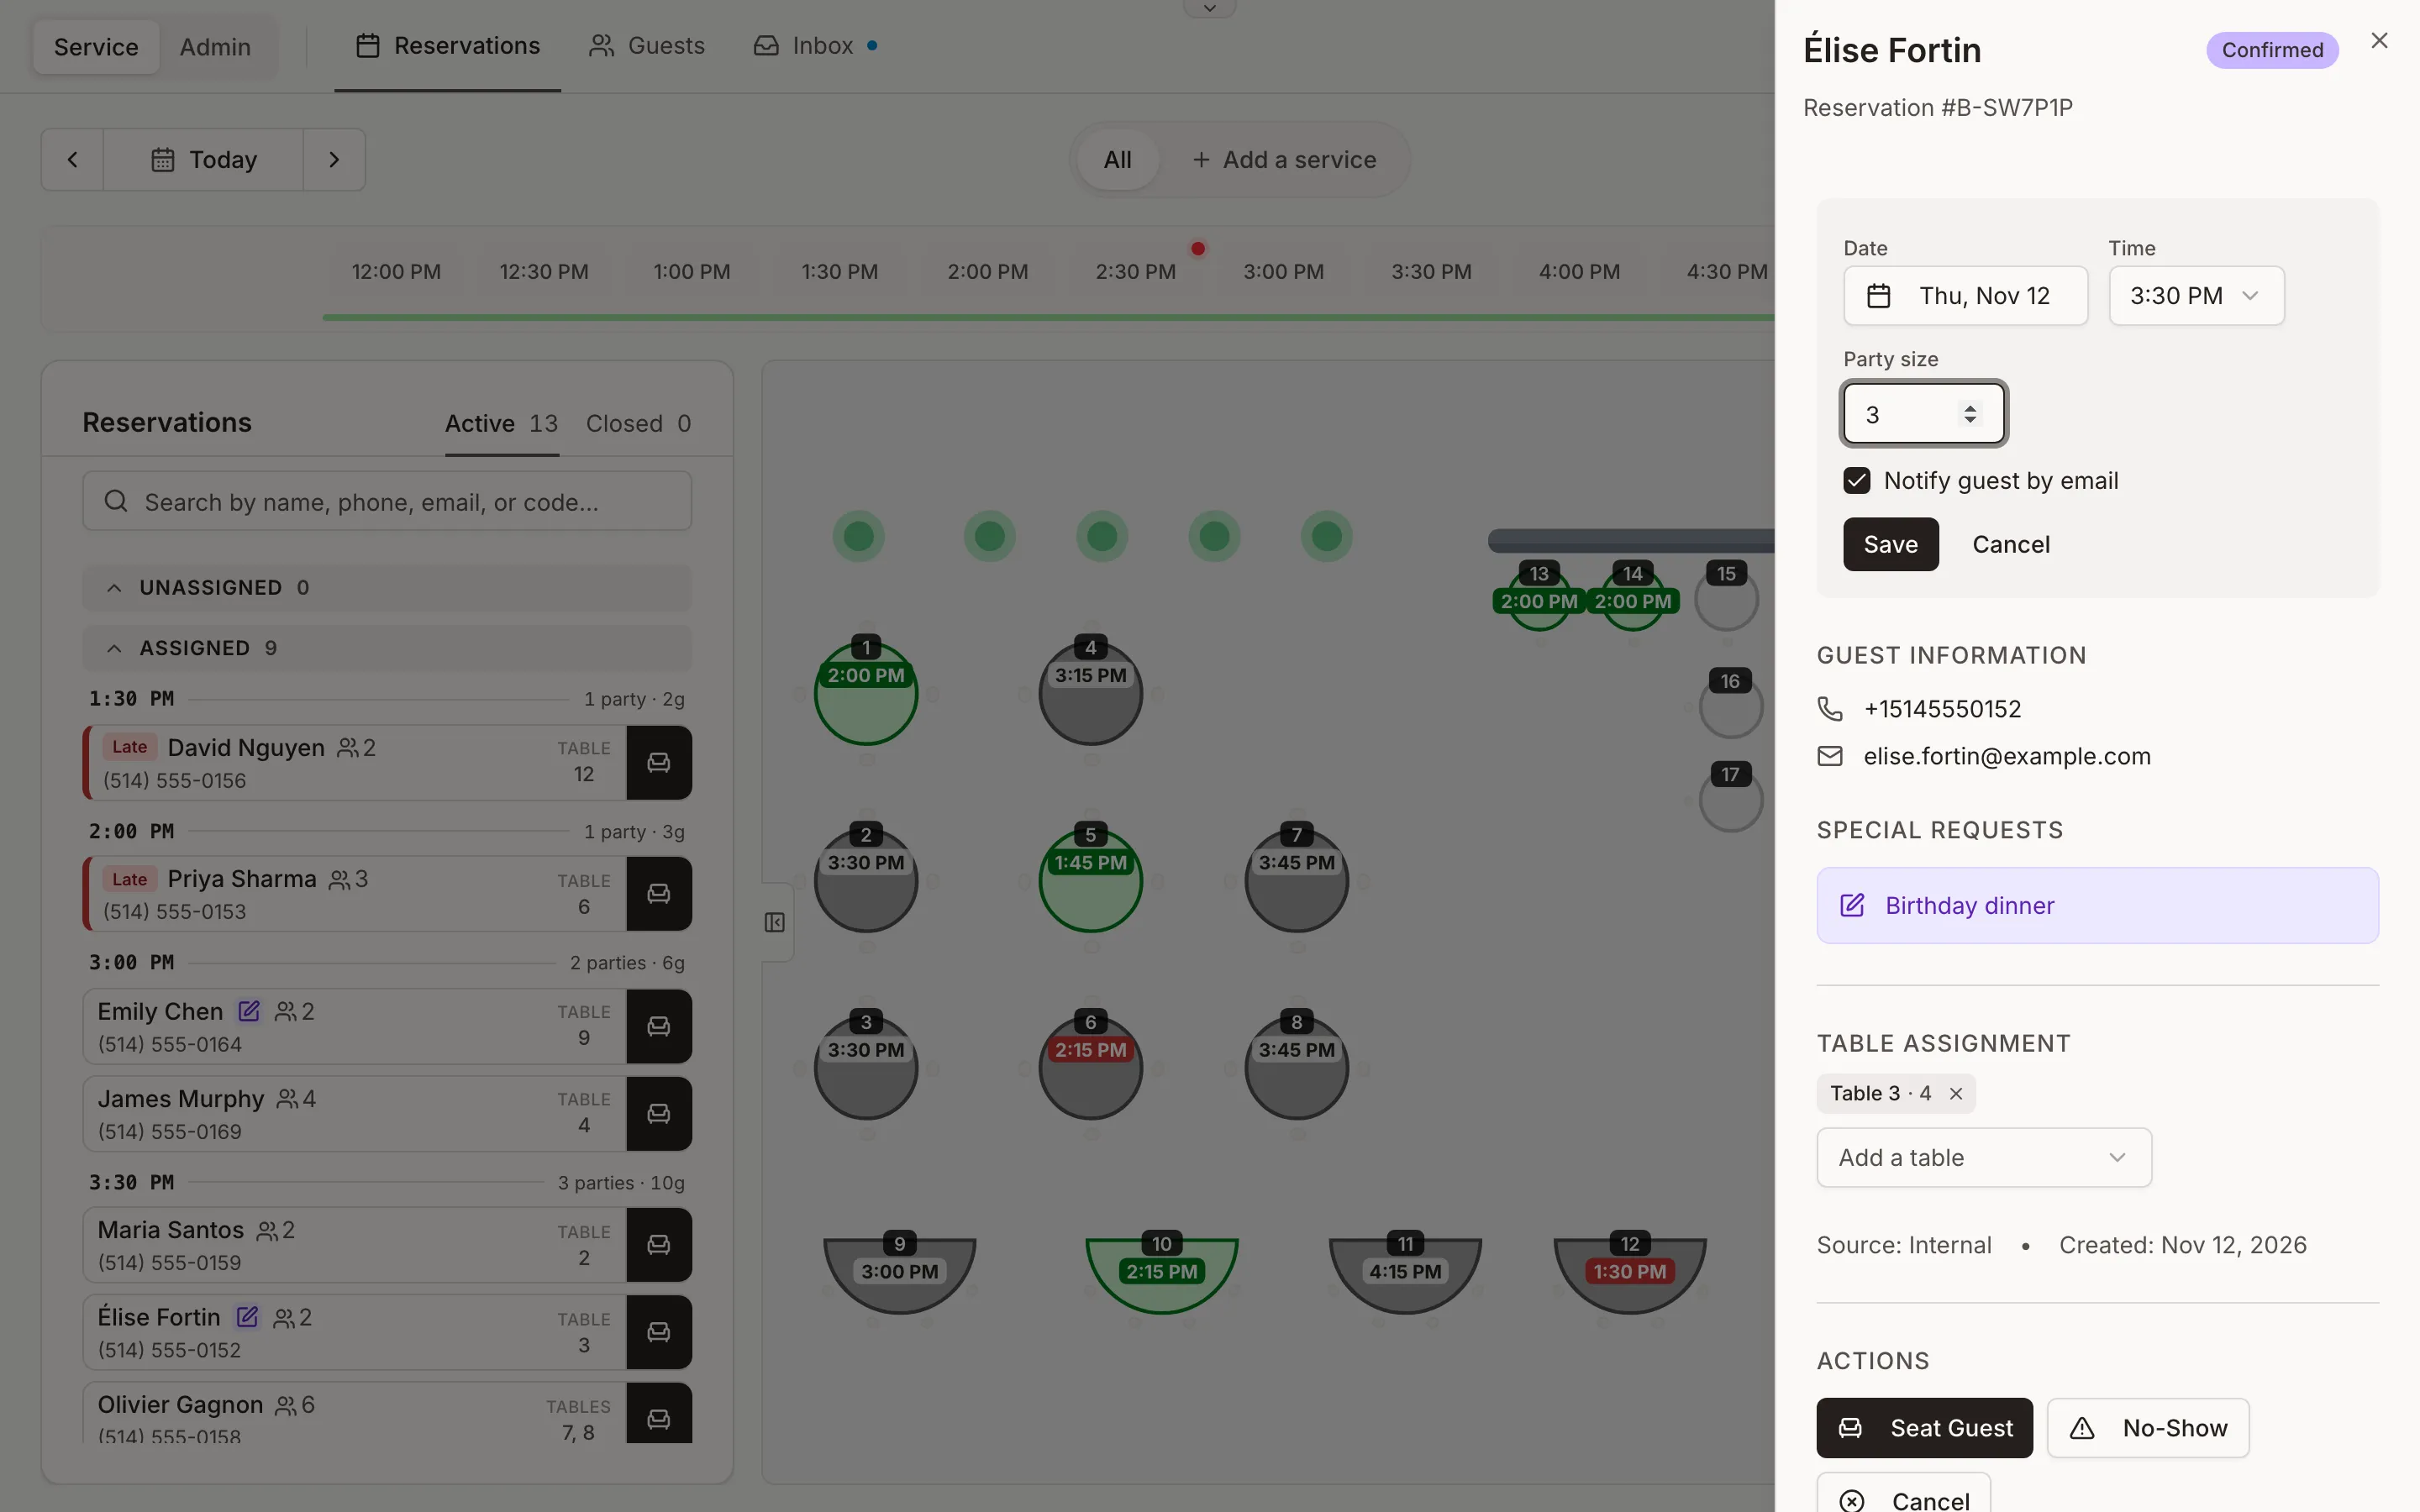
To move the party to another table, use Table assignment in the same panel: remove a table with its ×, or add one from the list.
Cancel a reservation or mark a no-show
Open the reservation and scroll to Actions.
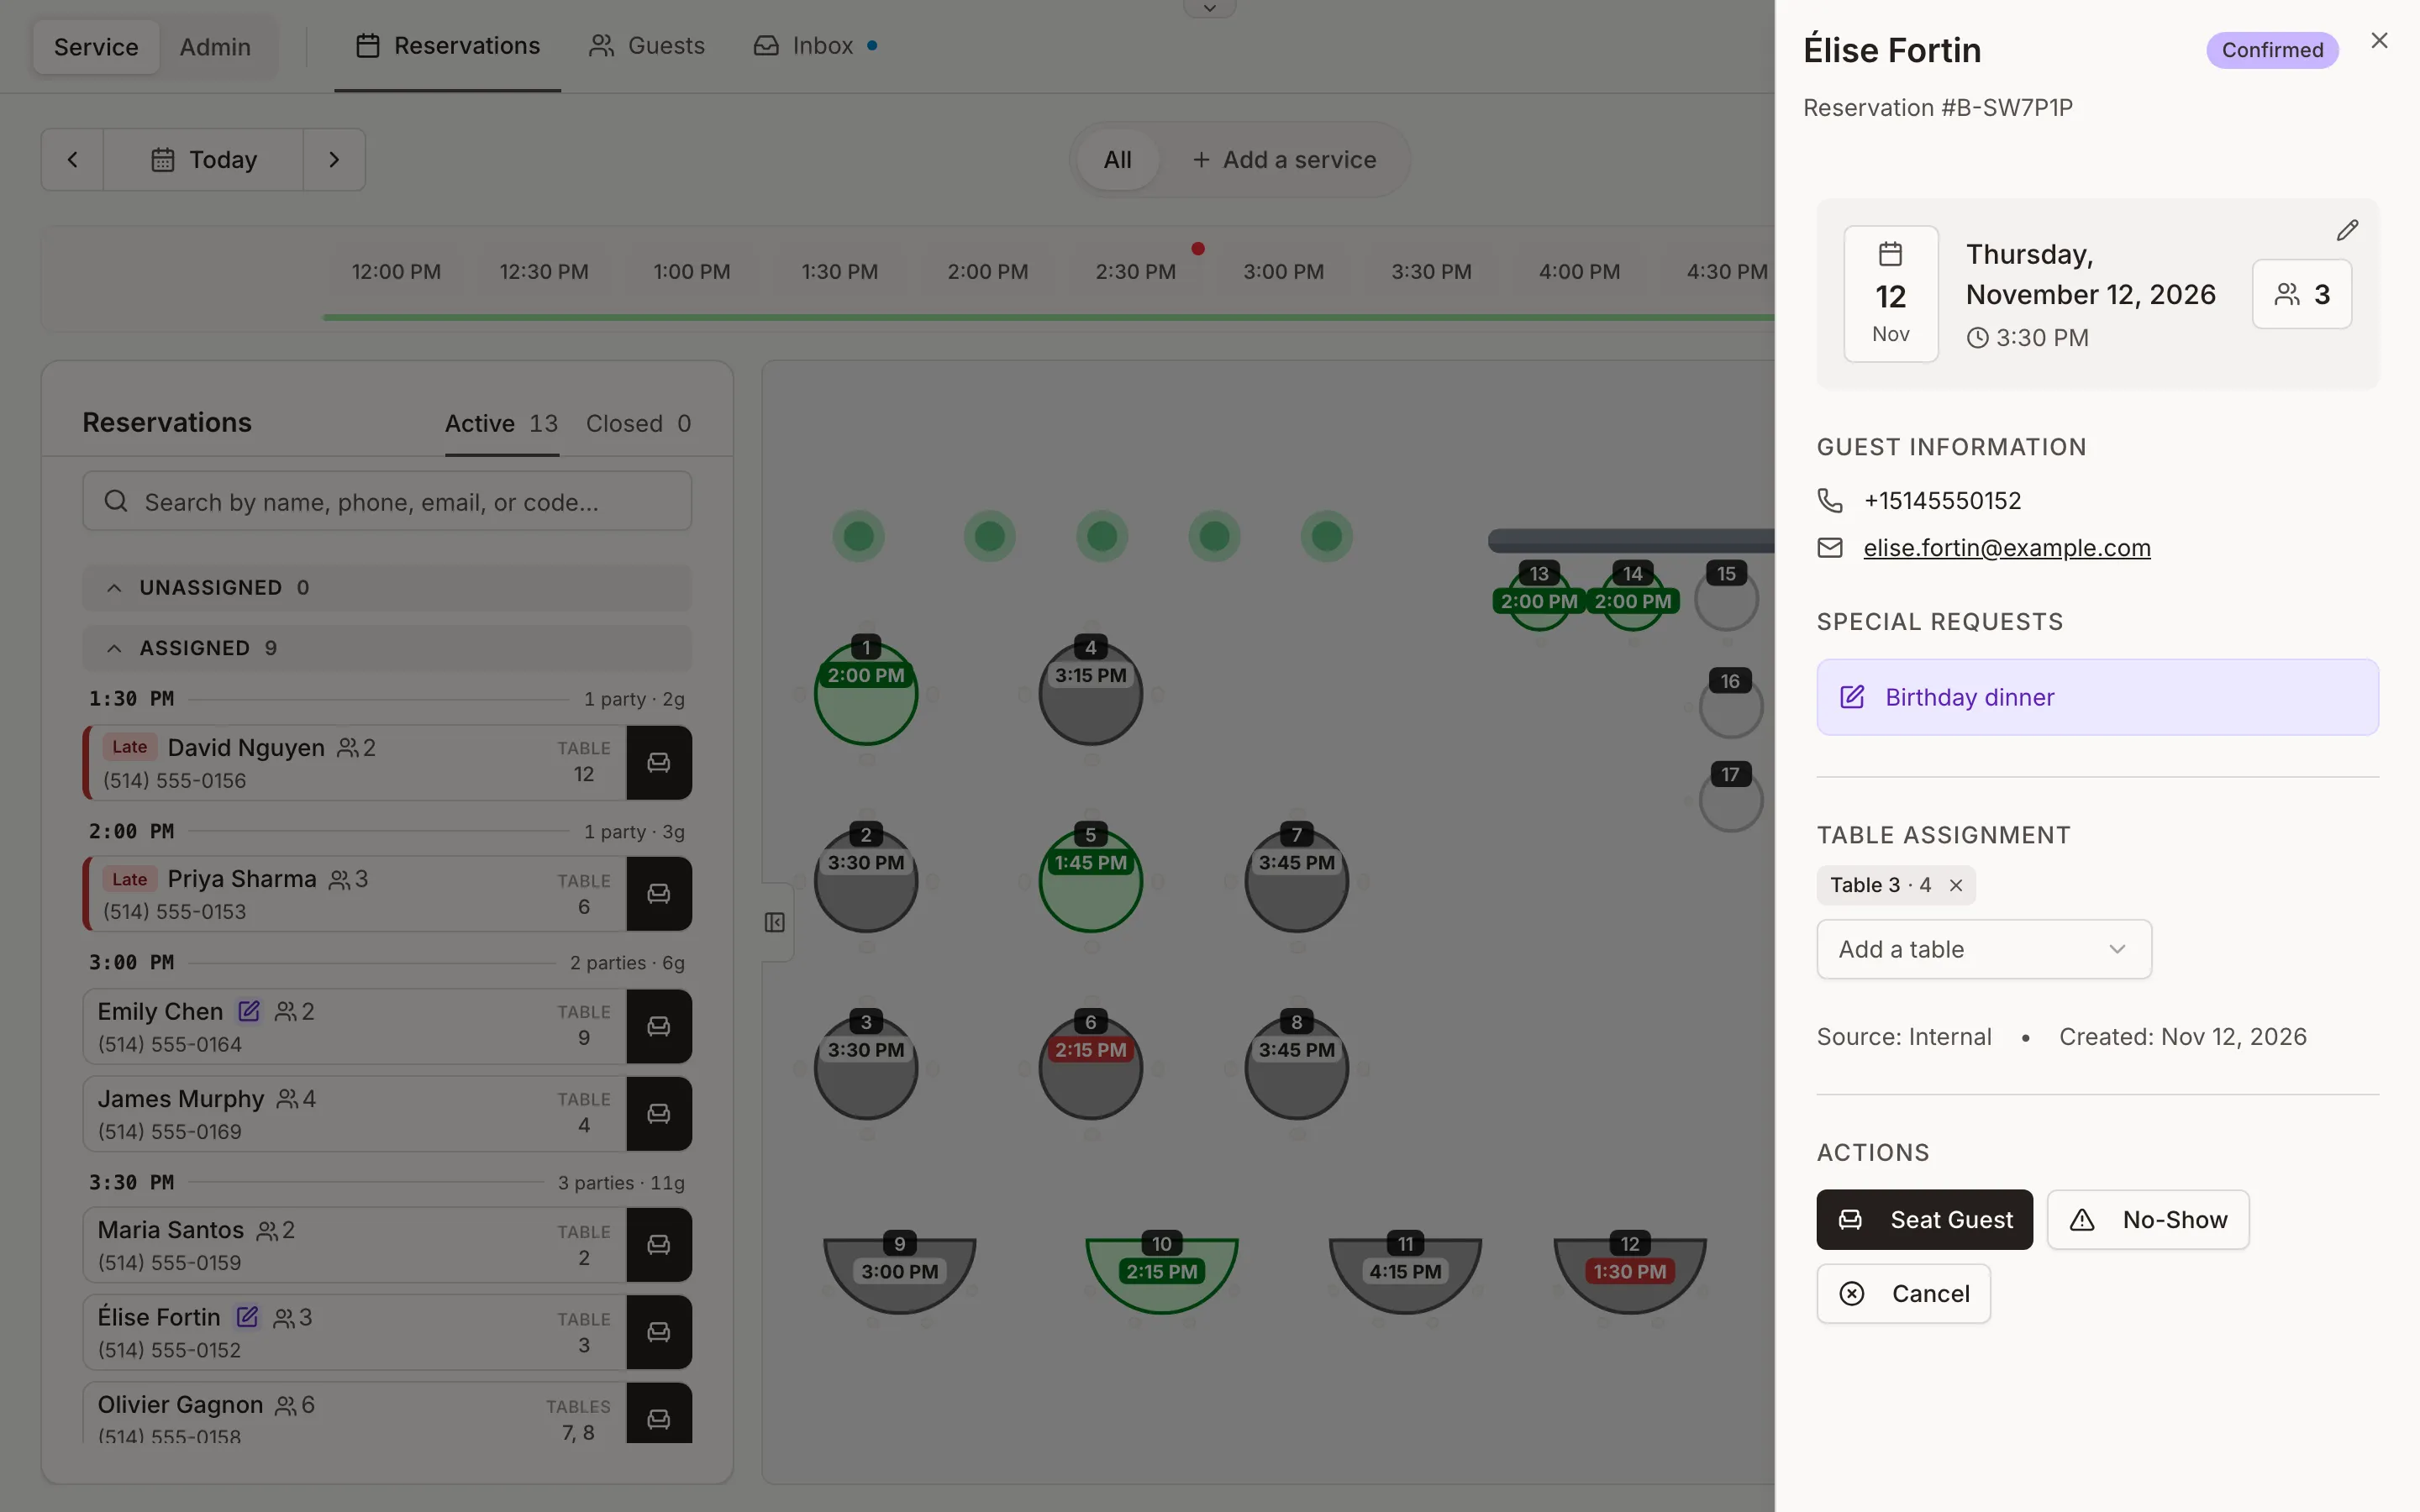
- Cancel is for a guest who lets you know they are not coming. A card on file is cleared, never charged.
- No-Show is for a guest who never showed up and didn't tell you. If a card is on file, you can then choose whether to charge the no-show fee.
Both ask you to confirm first, so a stray tap does nothing.
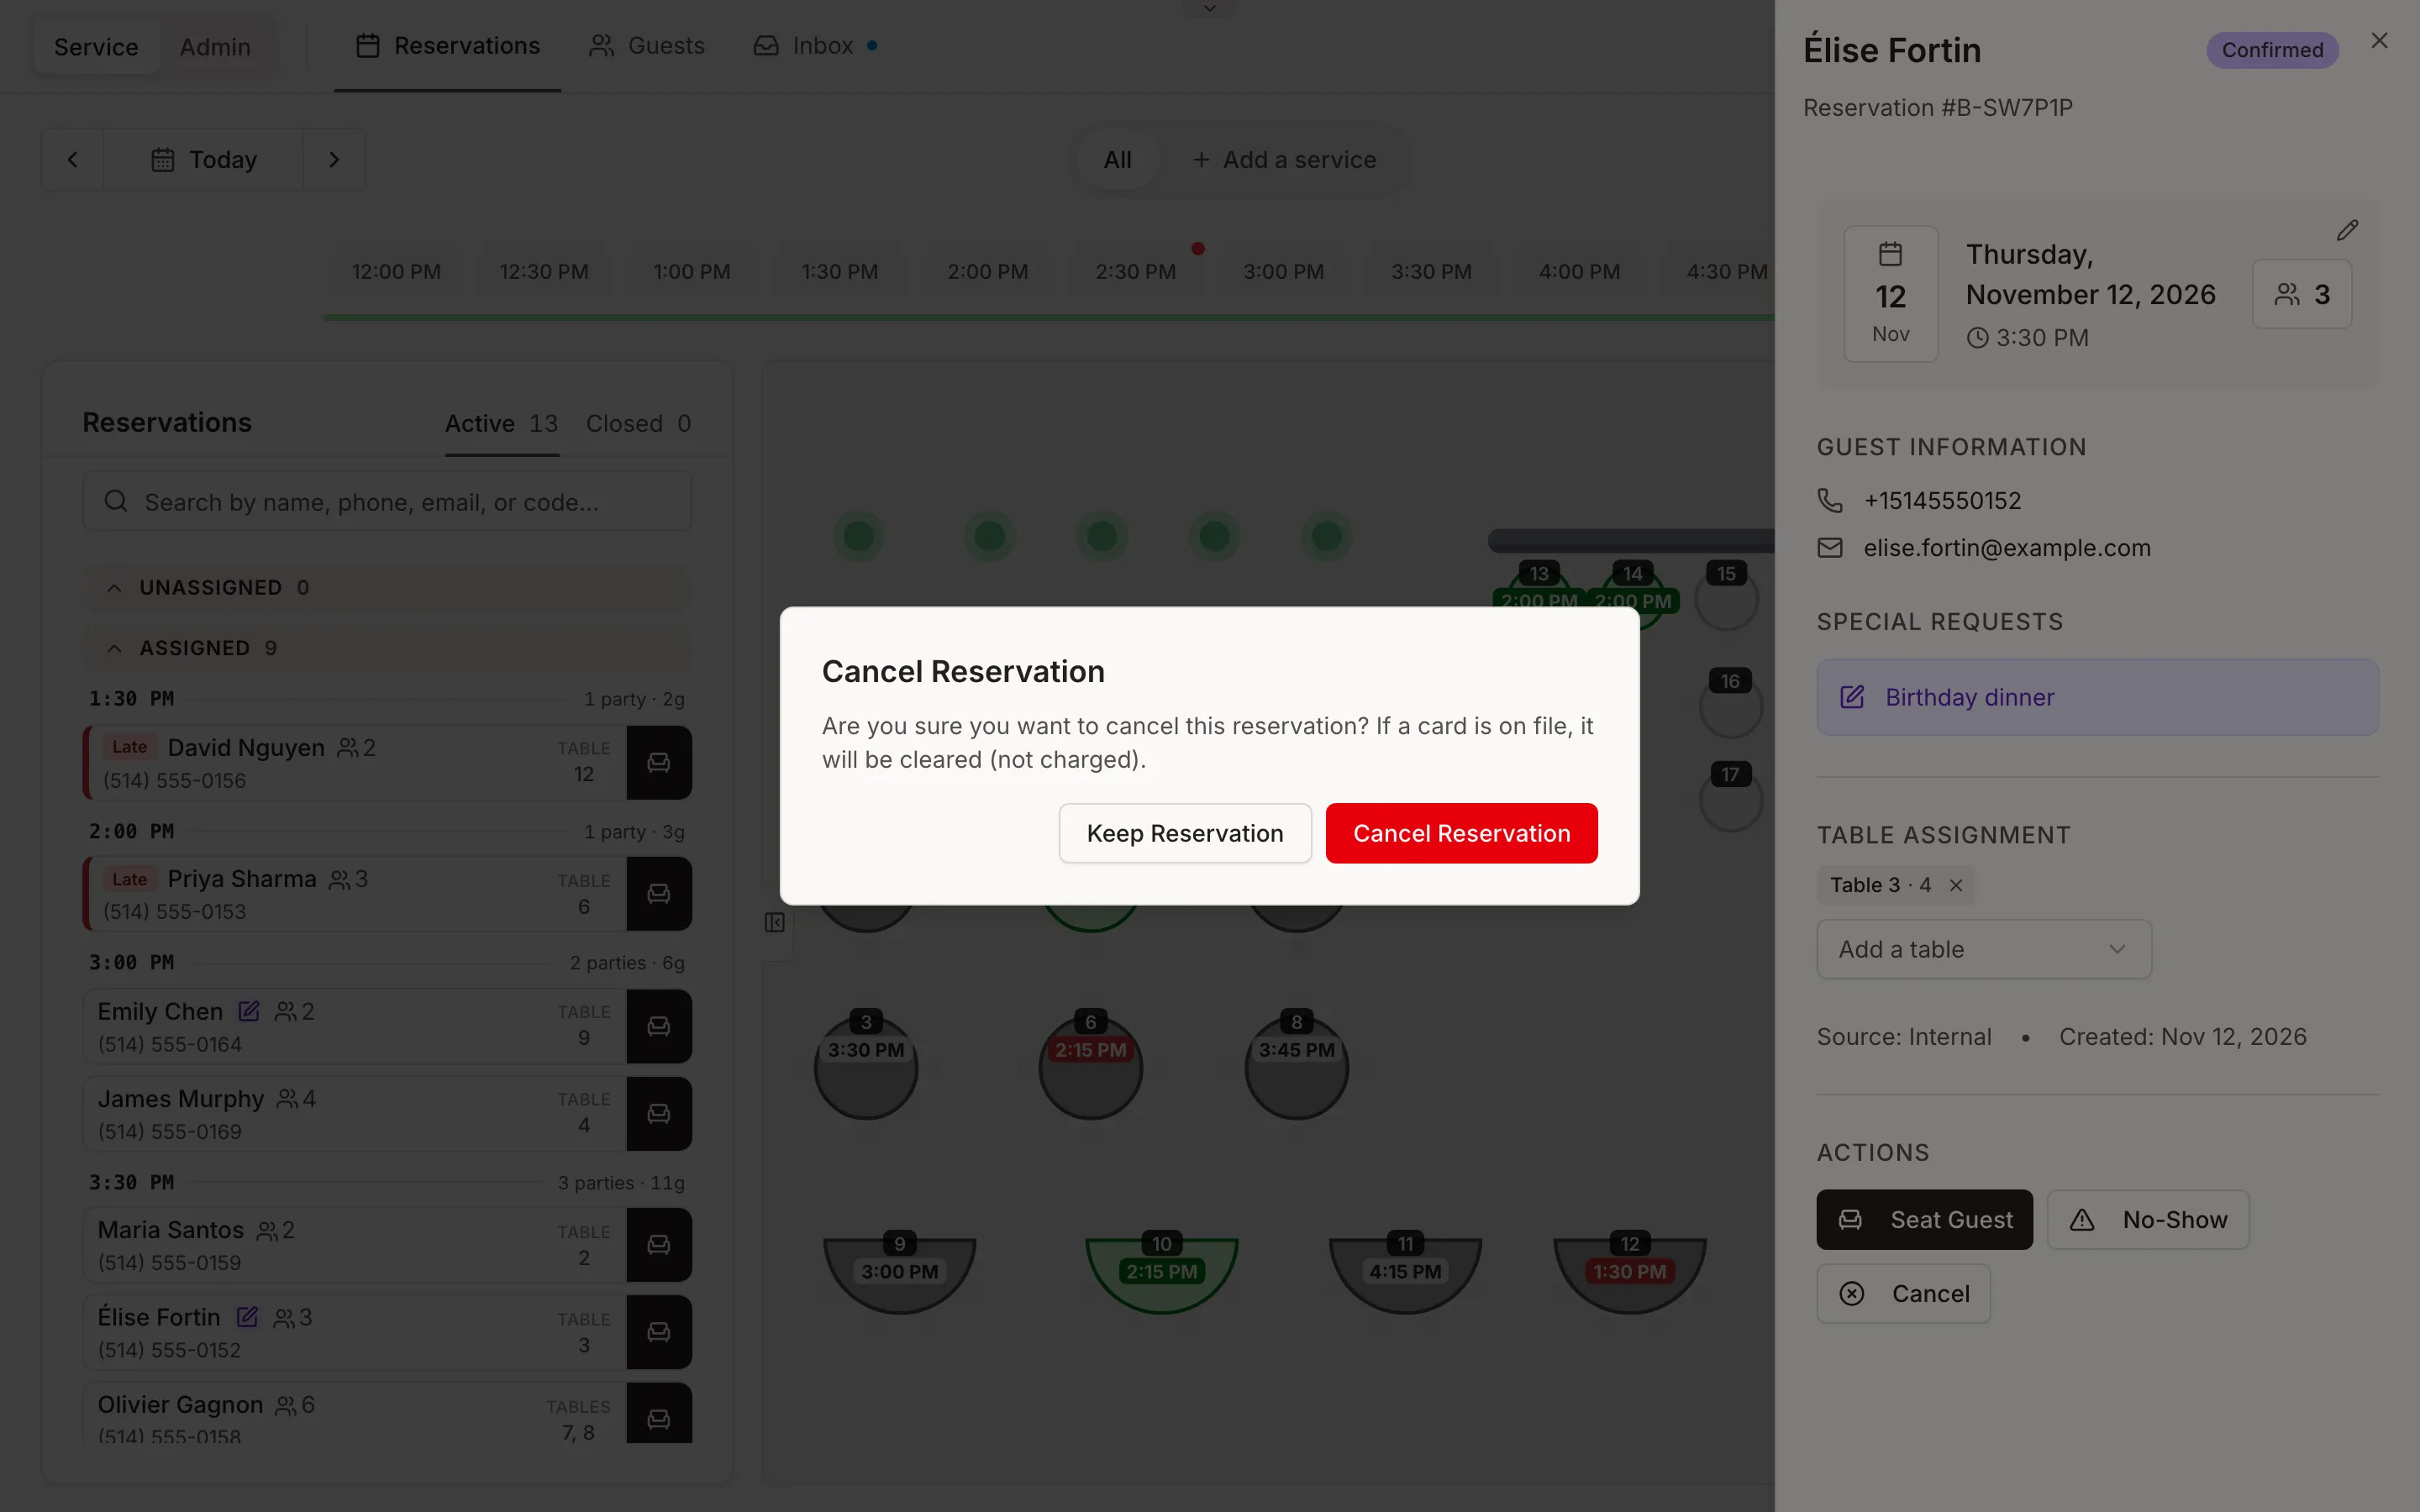
Tip: keep No-Show for guests who really didn't turn up. The count shows on the guest's profile and in the guest search the next time they book, so a guest who called ahead shouldn't carry one.
Restore a cancelled reservation or a no-show
Cancelled the wrong reservation, or a no-show turned up after all? You can put it back.
-
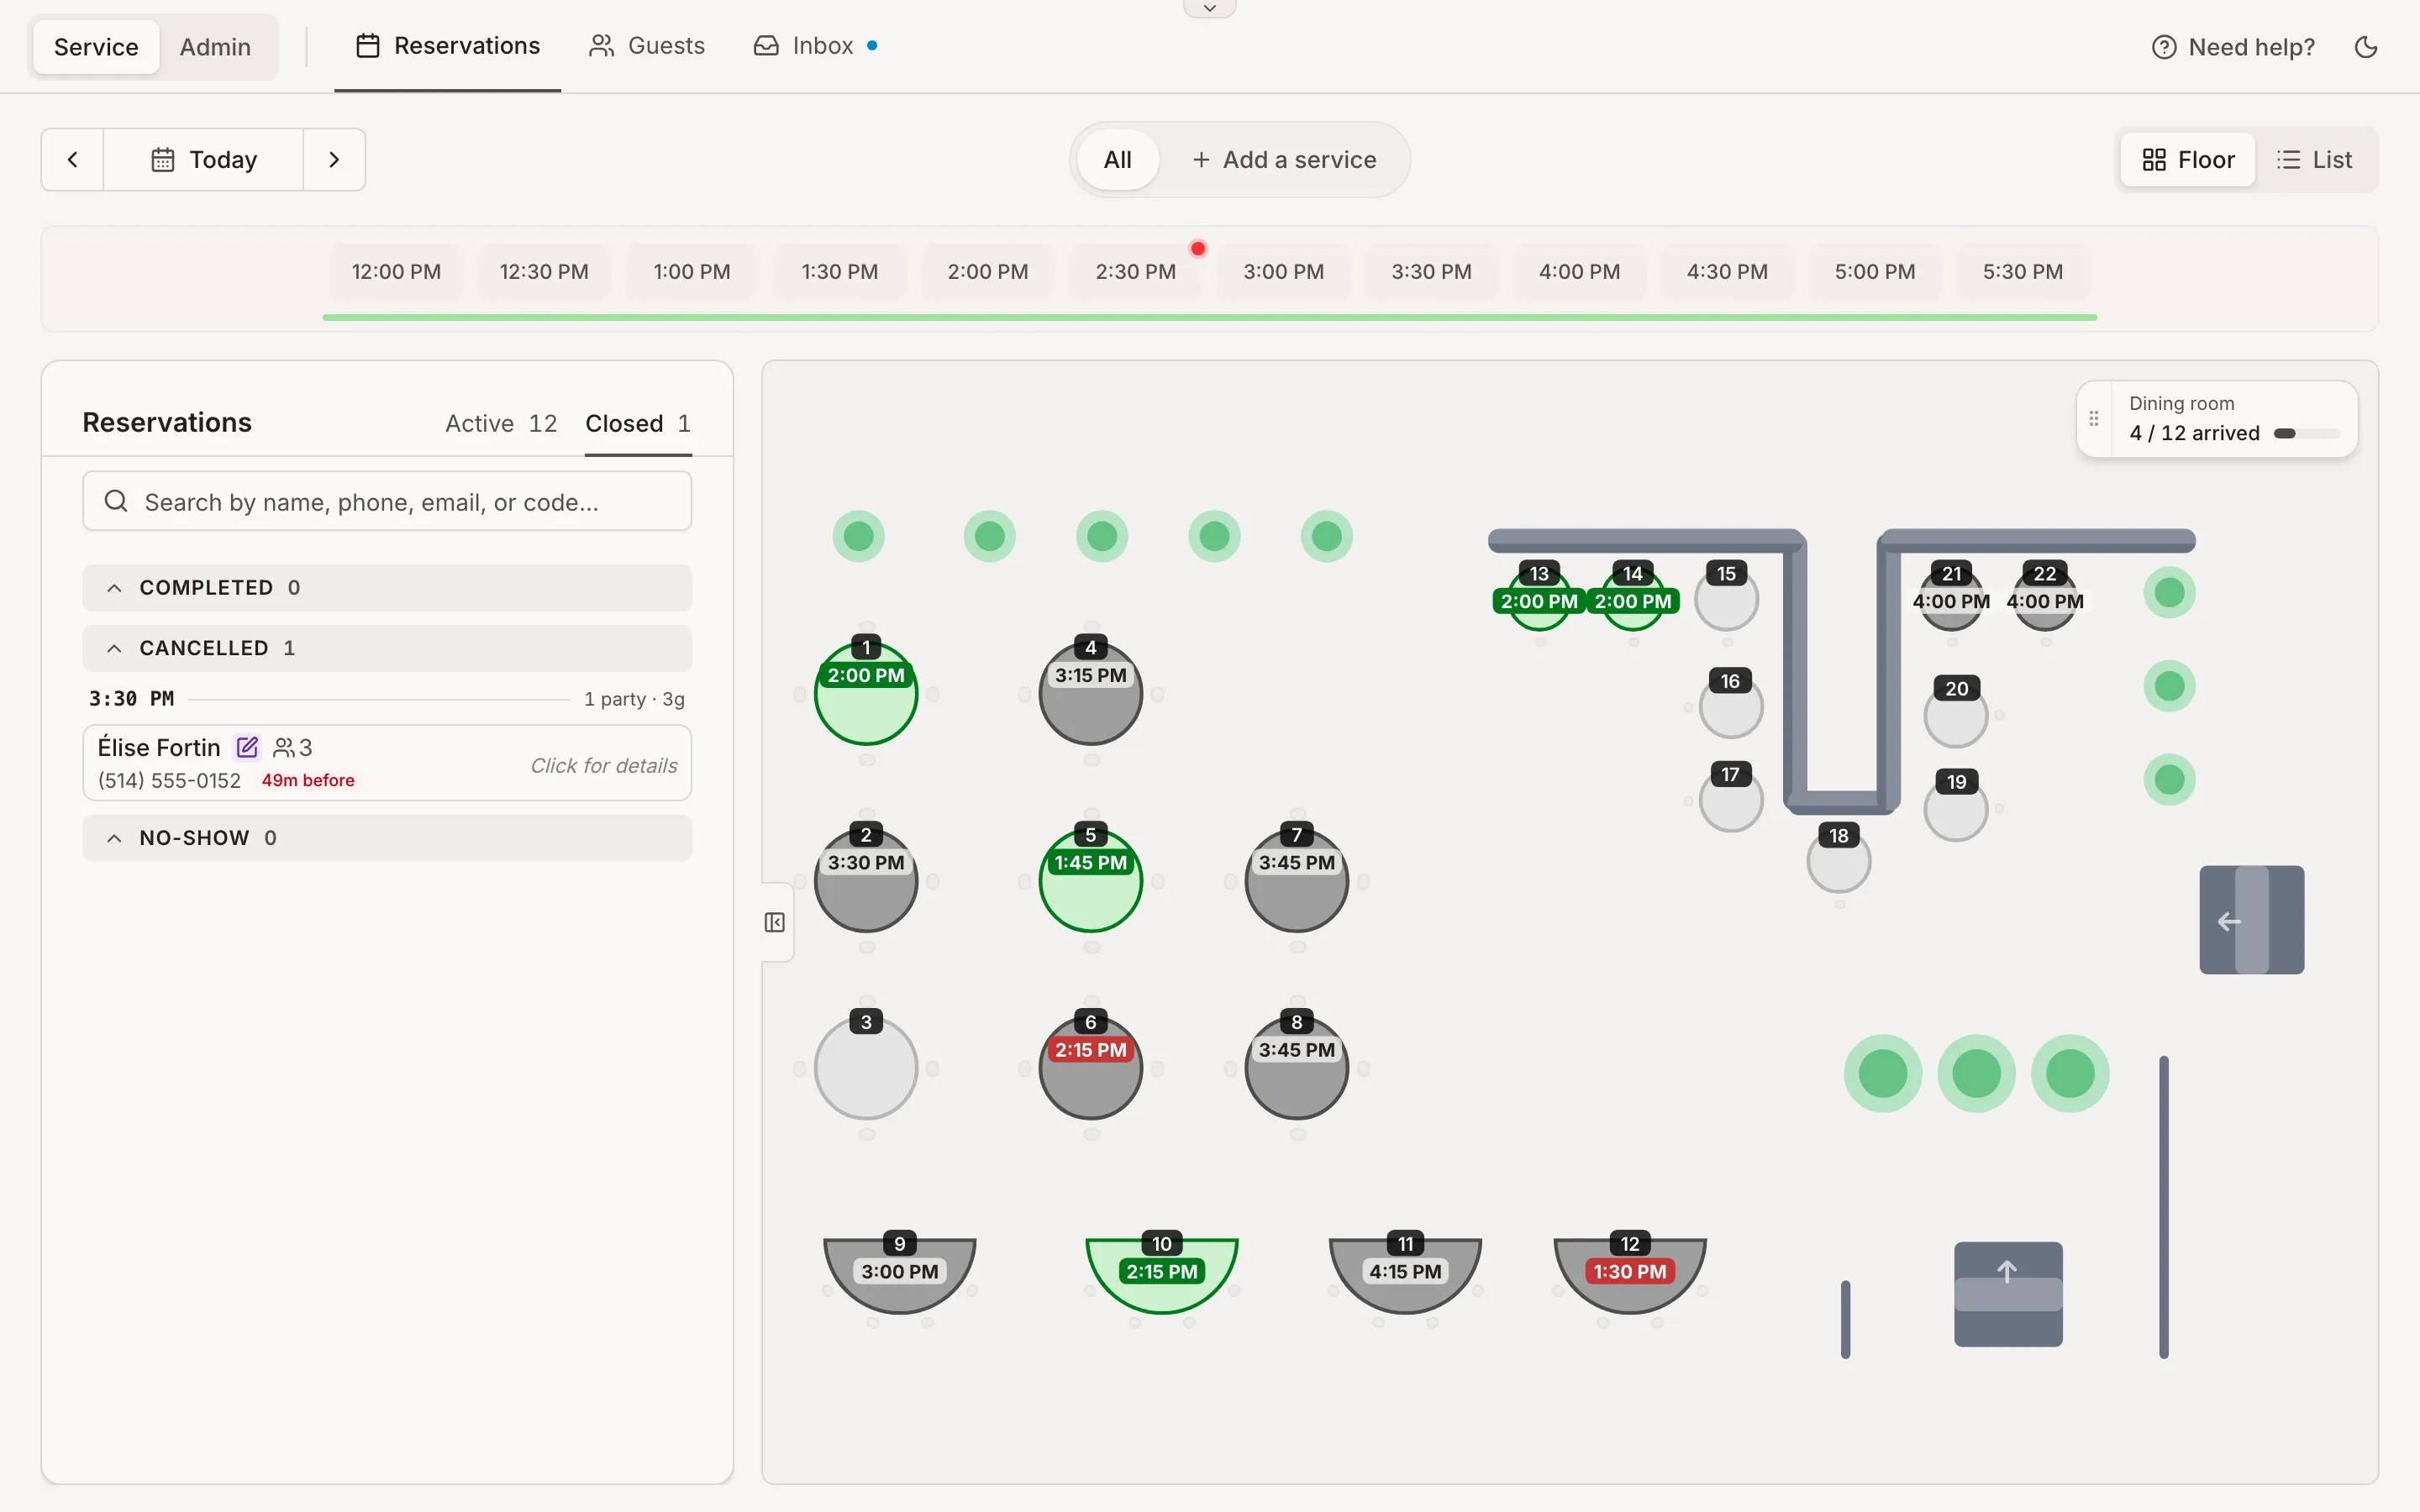
Above the list on the left, click Closed. Cancelled, no-show and completed reservations are kept there.
-
Open the reservation and click Restore to Confirmed. If the guest is already at the door, Seat Guest seats them straight away.
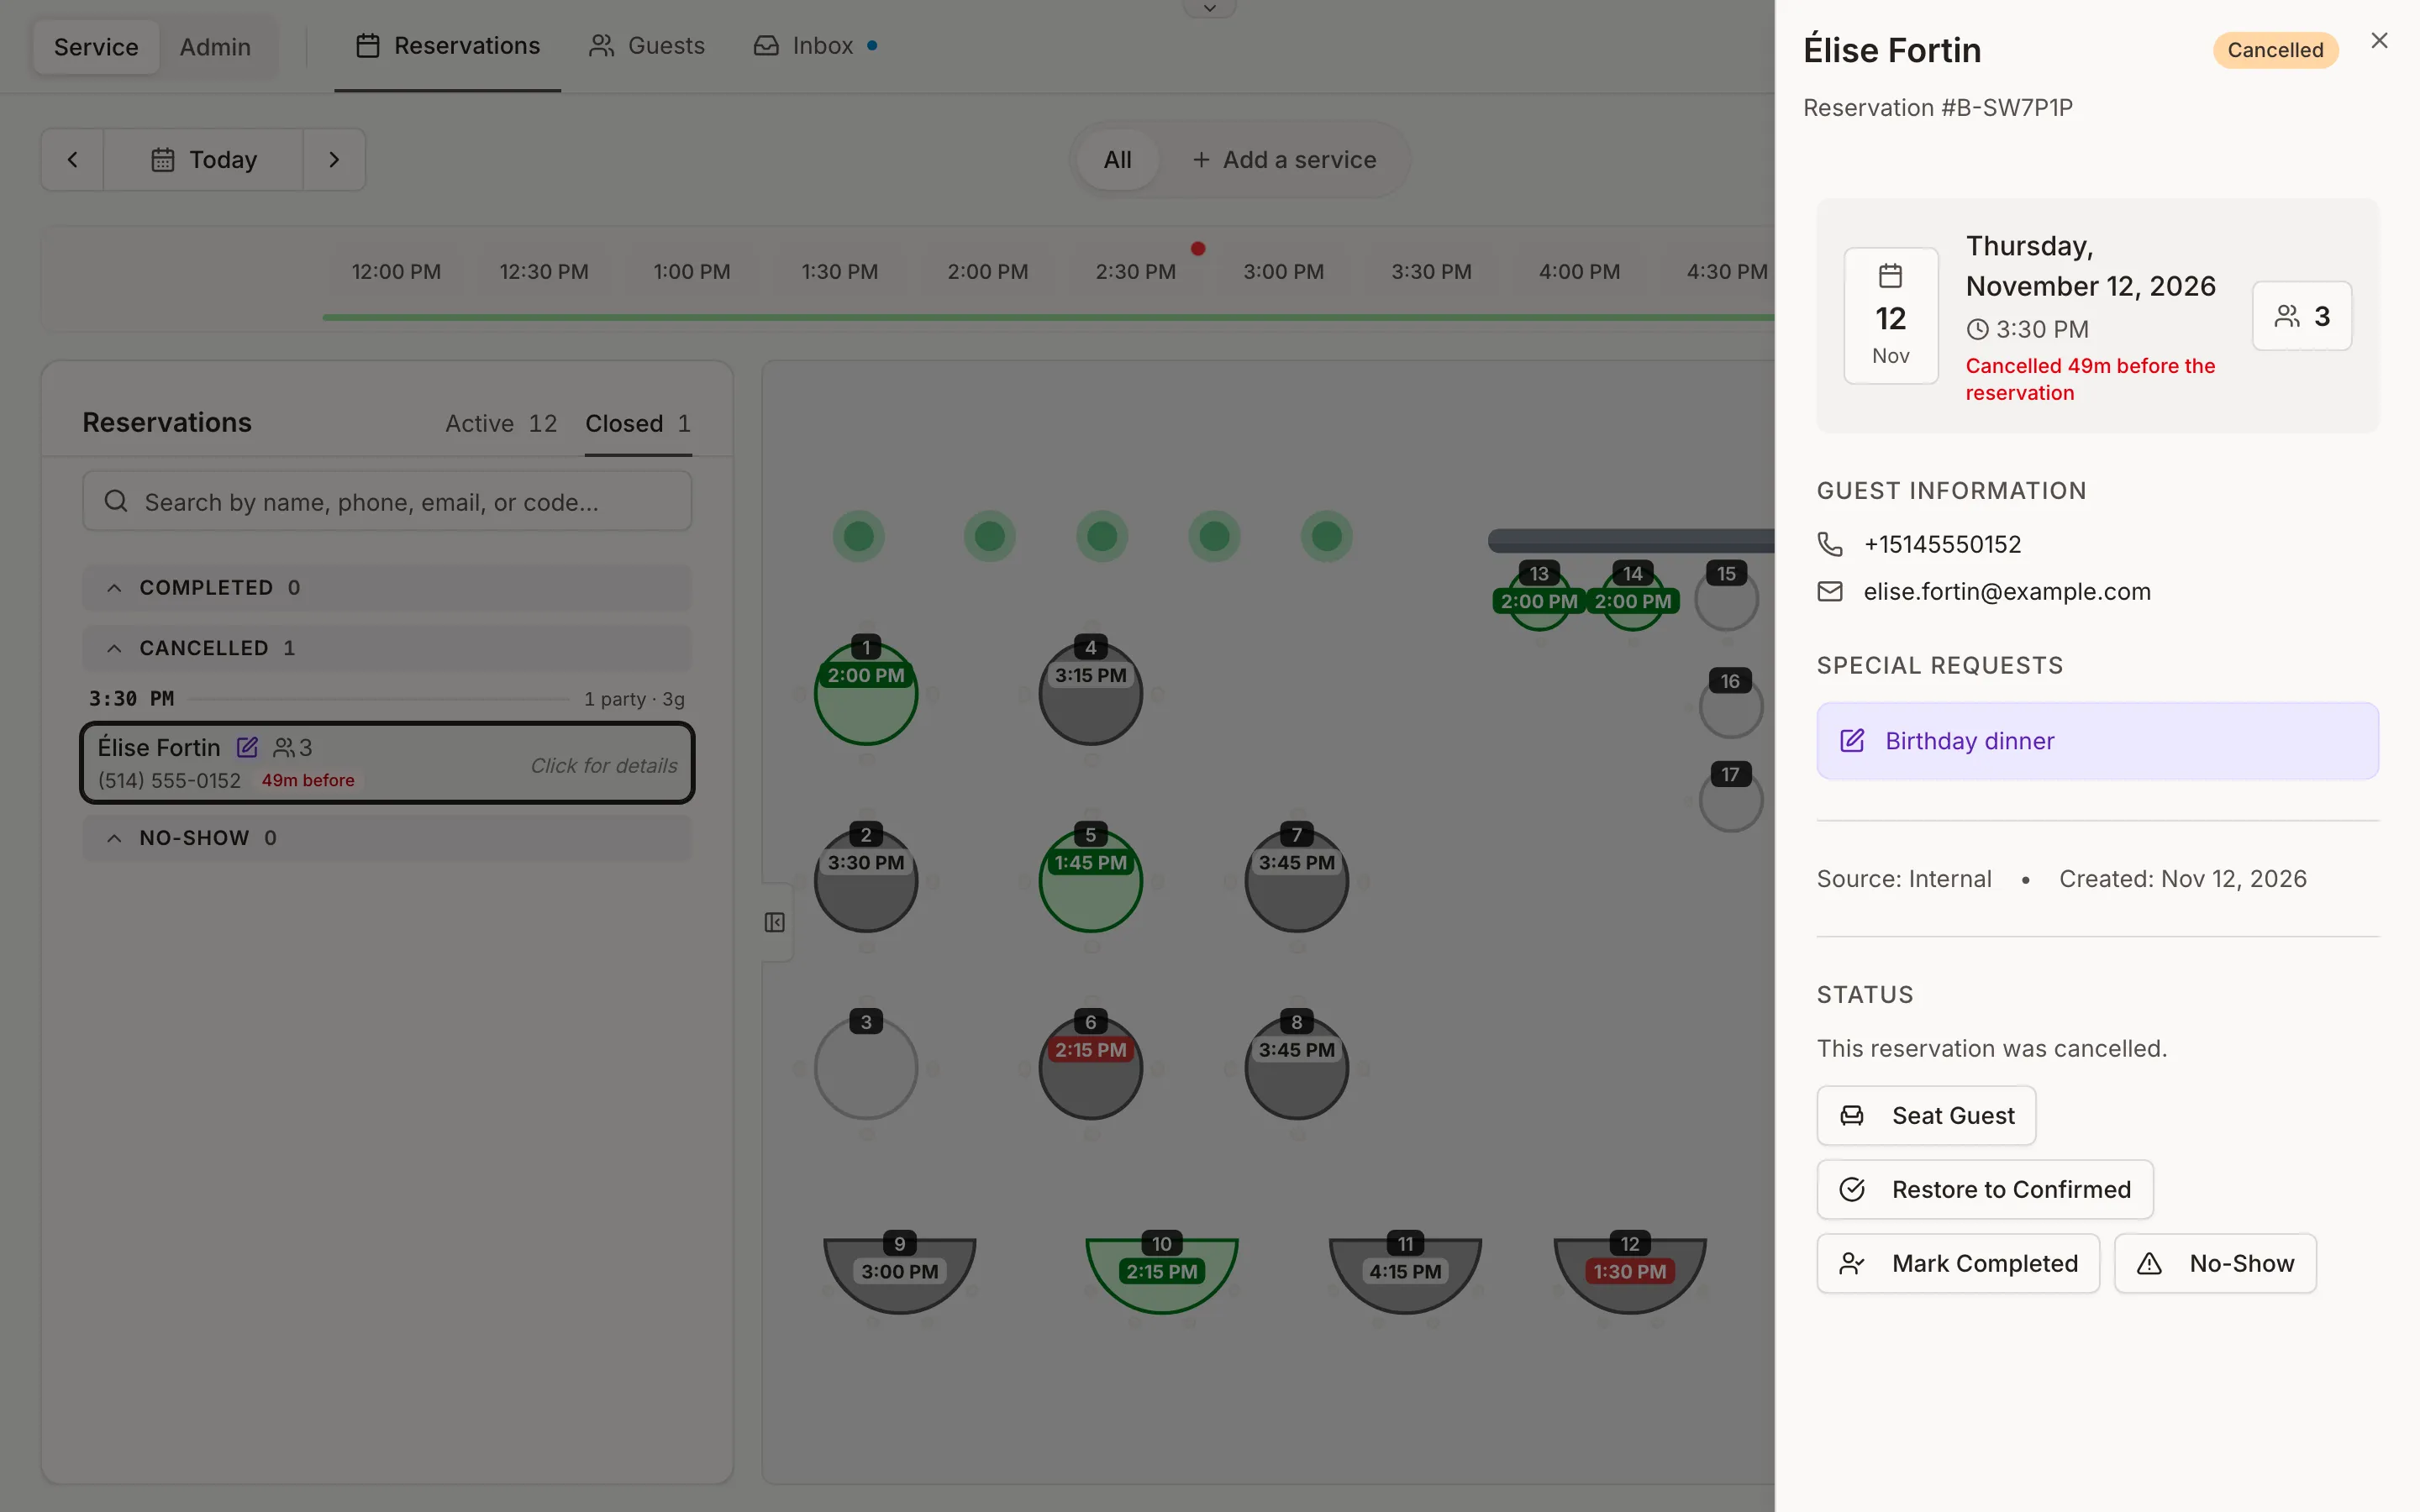
The reservation goes back to the list on its old table, and the guest gets no email. Before you restore, check two things:
- The table. If you gave it to another party in the meantime, move one of the two.
- The card. Cancelling cleared it, and restoring doesn't bring it back. A no-show whose fee was charged stays a no-show. If you charged it by mistake, refund the guest in Stripe.